
Life has been busy so I haven’t been able to write a good blog post in a while. If you don’t already, please follow my Instagram for exclusive Instagram content , including videos, additional photos, smaller DIY projects, polls, and more frequent posts!
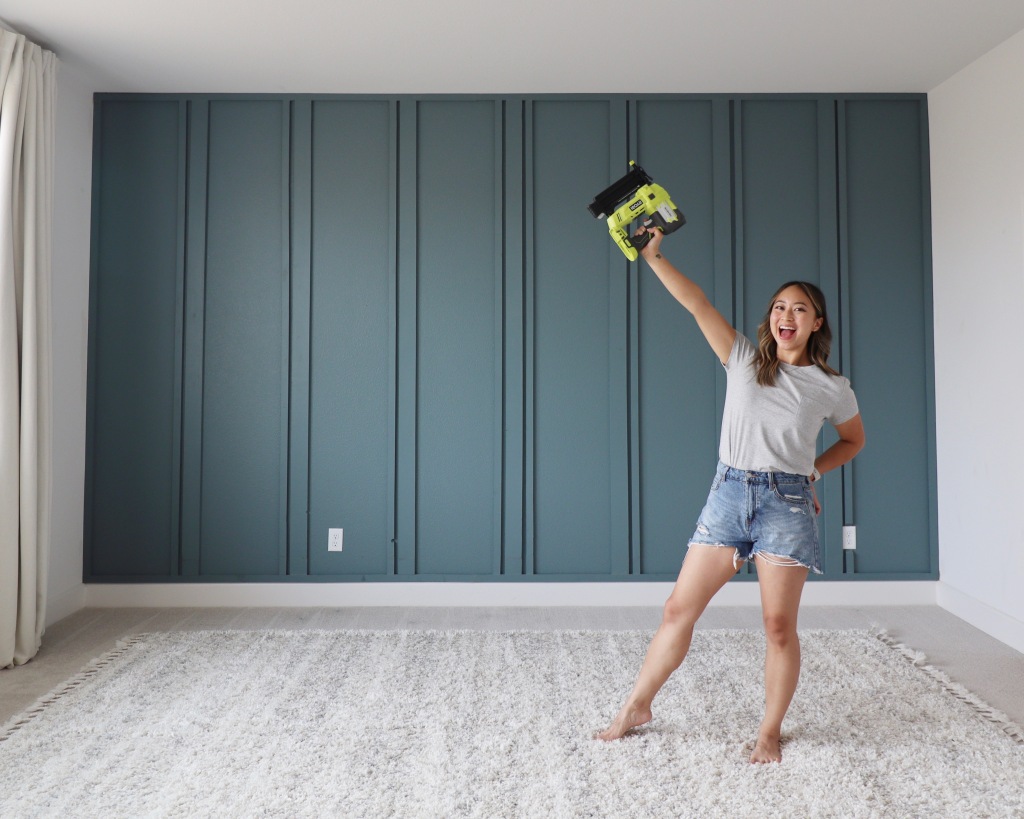
After a month-long hiatus from this blog, I’m glad to be back with some good content! I am feeling incredibly accomplished and am SO excited to share this project with you!
I’ve wanted to do a wood panel accent wall for years now but have been so intimidated by the thought of doing so. I finally felt confident and comfortable enough with DIY projects to give it a try. What was I so afraid of before? The calculations? The brad nailer? The amount of work involved? Or all of the above? Now that I’ve completed a wood panel wall, I LOVE IT and want one in every room!!
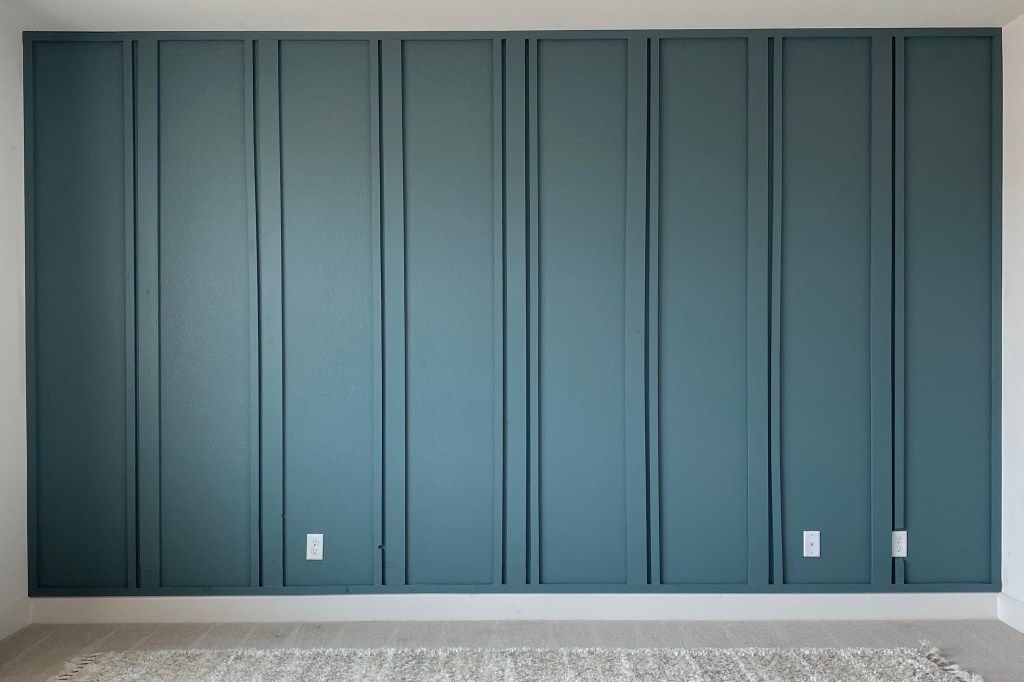
What is a wood panel wall anyway? Well… It’s a type of wall treatment that uses wood boards, placed in a specific pattern or design, to add interest to a wall. There are so many types of wood wall treatments, including board and batten, shiplap, beadboard, and wainscotting… to name a few. I believe the type of wood paneling I chose is called “raised wood paneling.” Here are some examples by Liz from Within the Grove and Angela from Angela Rose Home.


I chose to add wood panels to our primary bedroom wall. Other than the great room, we spend the most time there and would love for it to be a sanctuary of some sort for us to unwind and relax. Also… If I messed up on my first wall panel accent wall, at least it would be in a room where guests would not be spending much time in.

So… Was it hard? It was definitely challenging enough for me to need a break from bigger DIY projects for a little while, but also easy enough that I would love to do this again to another wall in our house. Although there were A LOT of little steps and details involved with this project, it wasn’t actually a very complex project to do.
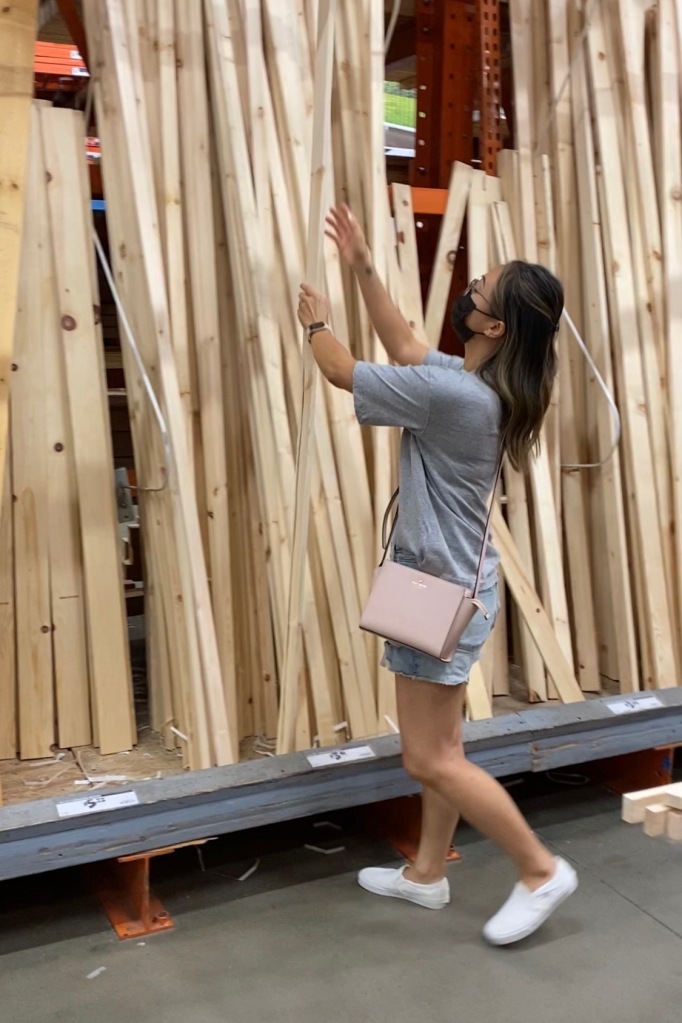
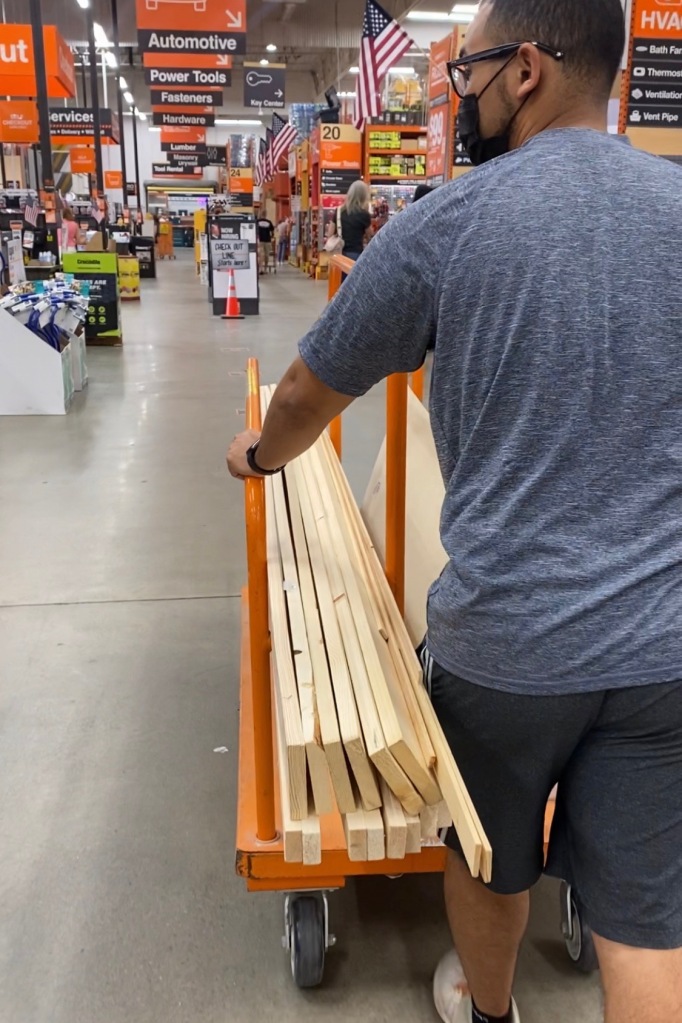
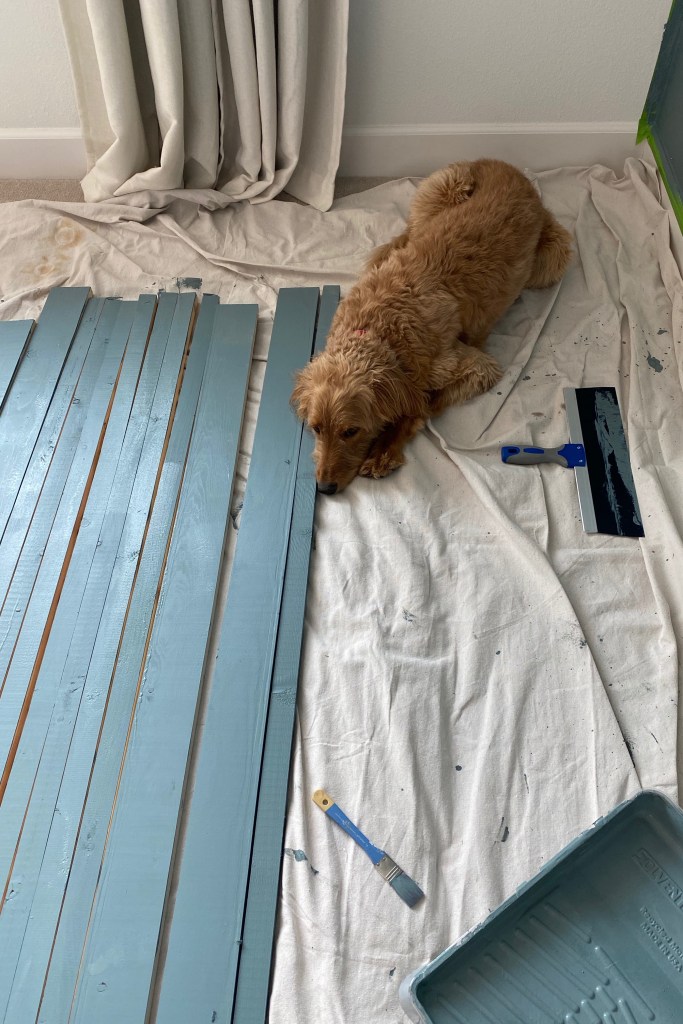
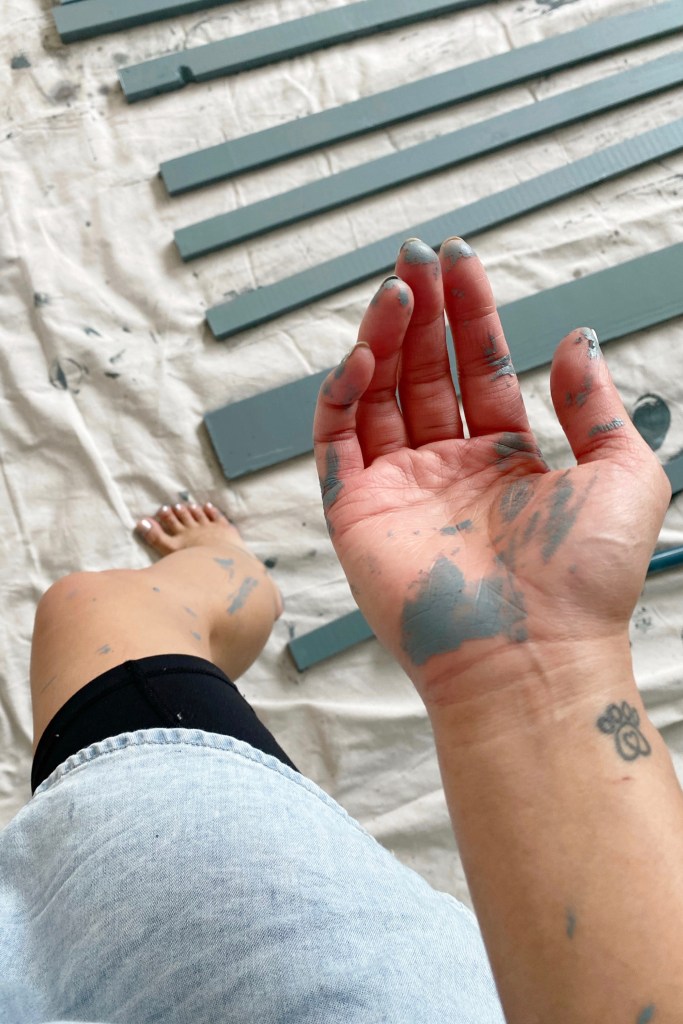
We started off by purchasing the wood for the specific design we wanted to create. Your shopping list will vary from ours based on your desired wood panel pattern. We purchased several 1″ x 2″ and 1″ x 4″ common boards from Home Depot. While we’re on the topic of common boards… If you haven’t gotten a chance to watch my Instagram post on how to select the best common board for wood projects, click here to take a look!
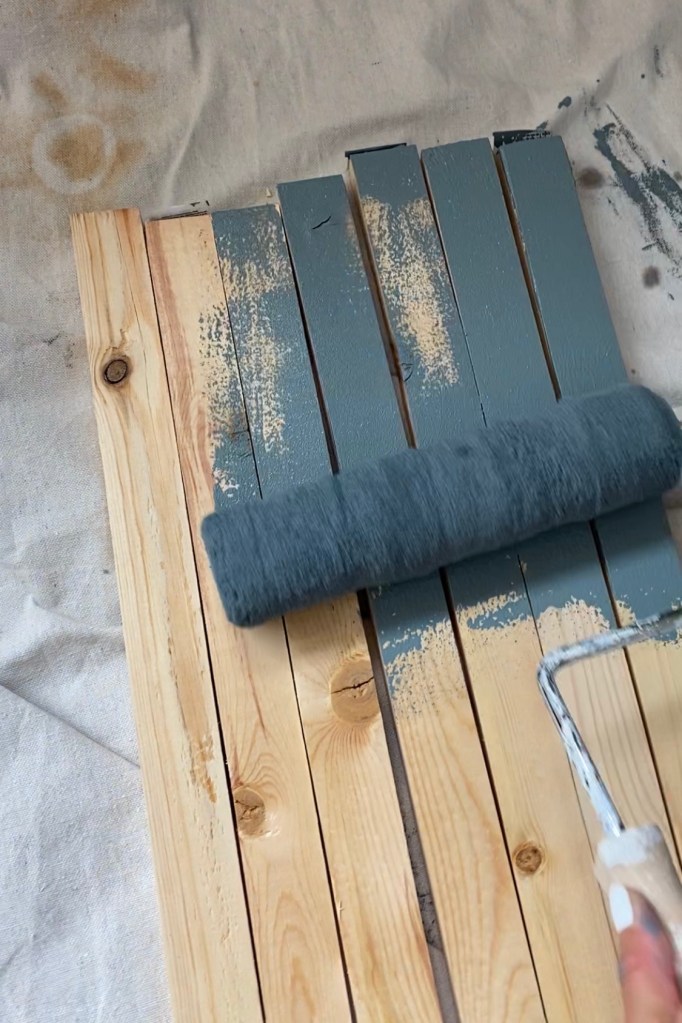
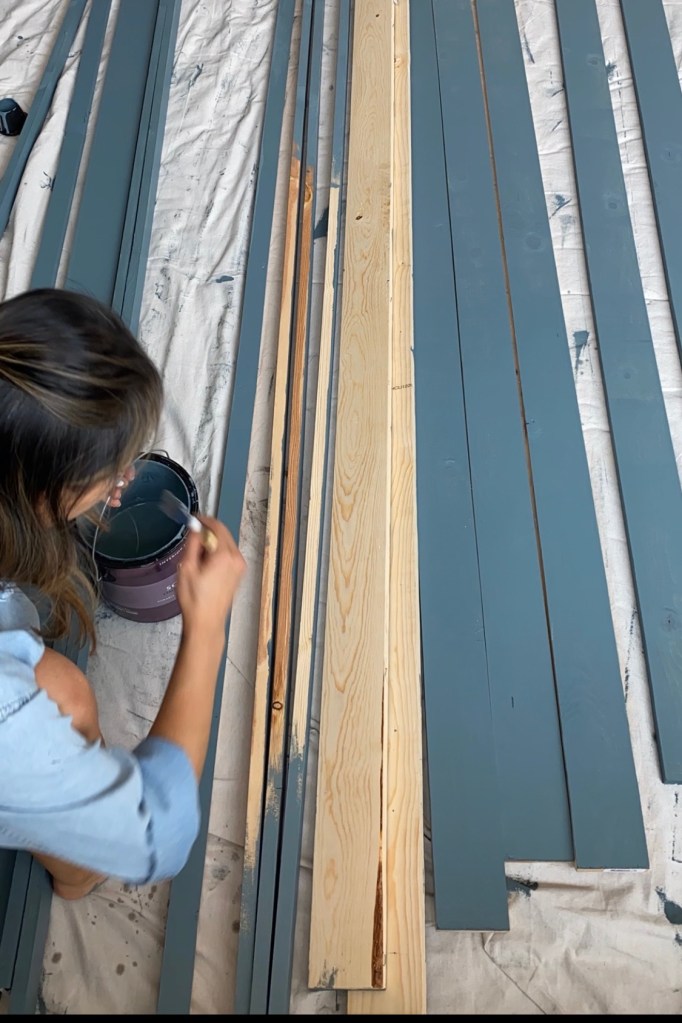
Many people recommend using primed MDF (Medium Density Fiberboard) for painted wood panel projects because they are inexpensive, smooth, and paintable with minimal defects and imperfections. I chose common board because I’m comfortable with it (I’ve never used MDF) and because common board can be slightly more affordable than MDF; however, after completing this project, I noticed that some of the wood textures and knots can be seen through the paint. For future wood panel accent walls, I will most likely choose smooth MDF boards, despite the extra cost, for an even cleaner look.
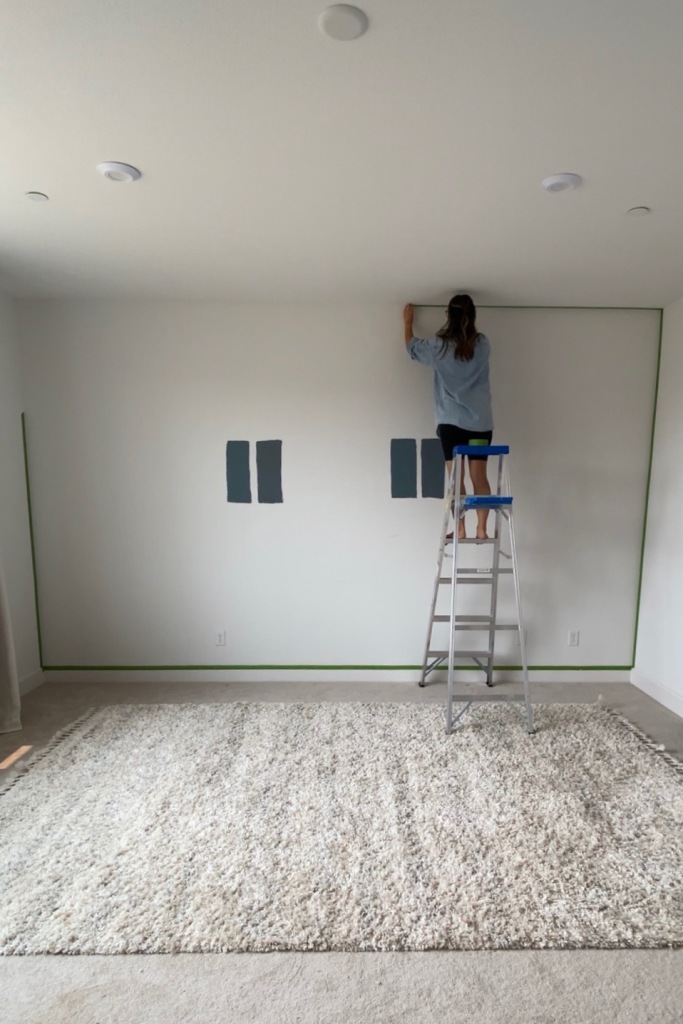
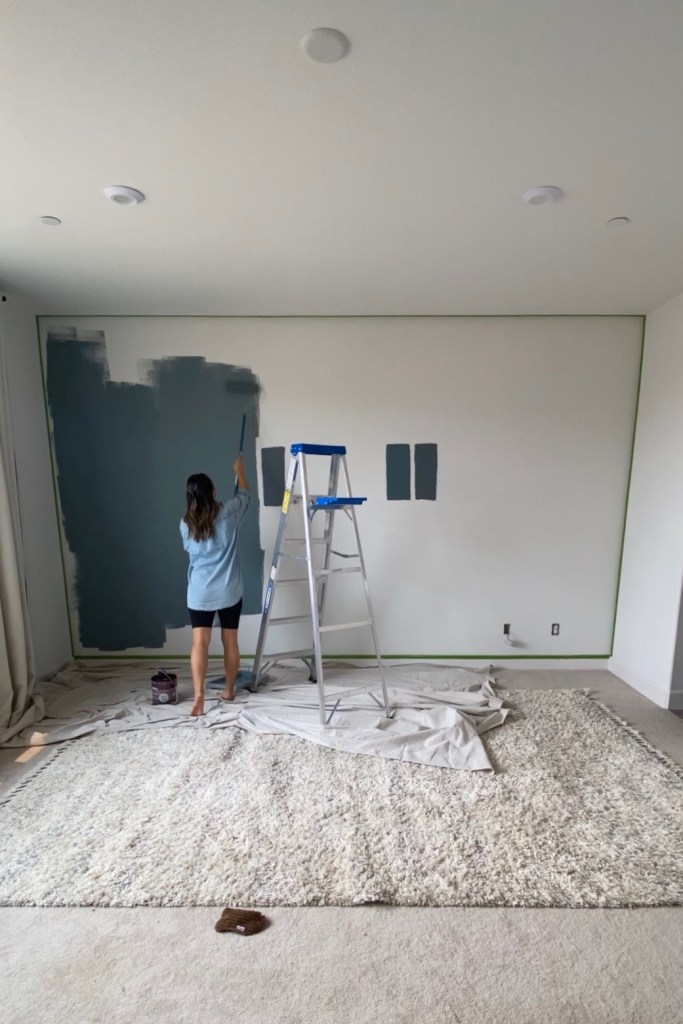
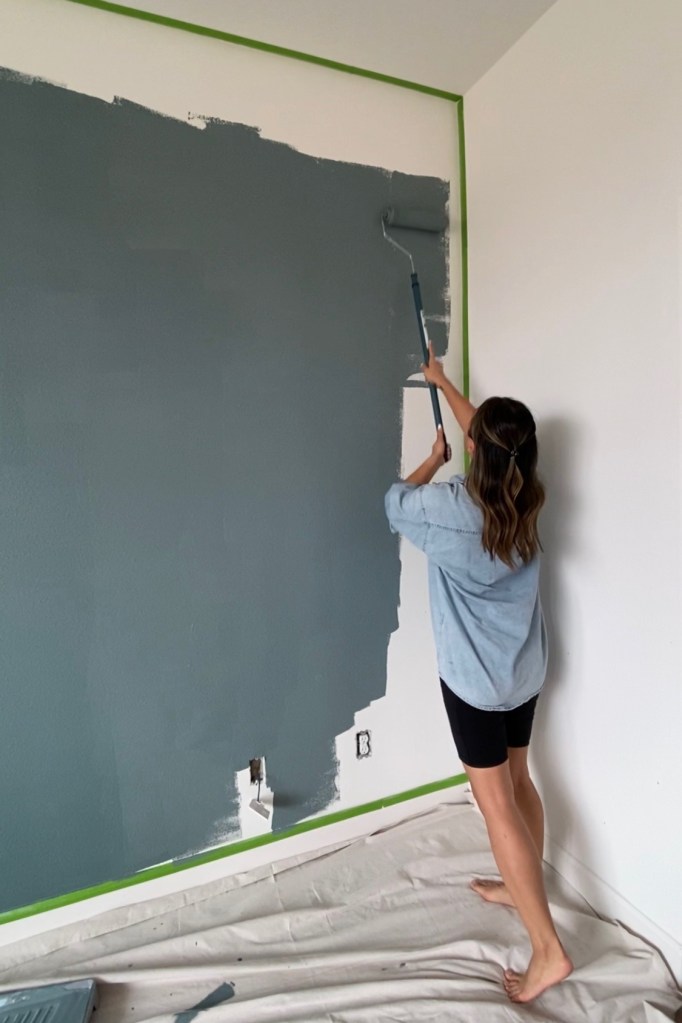
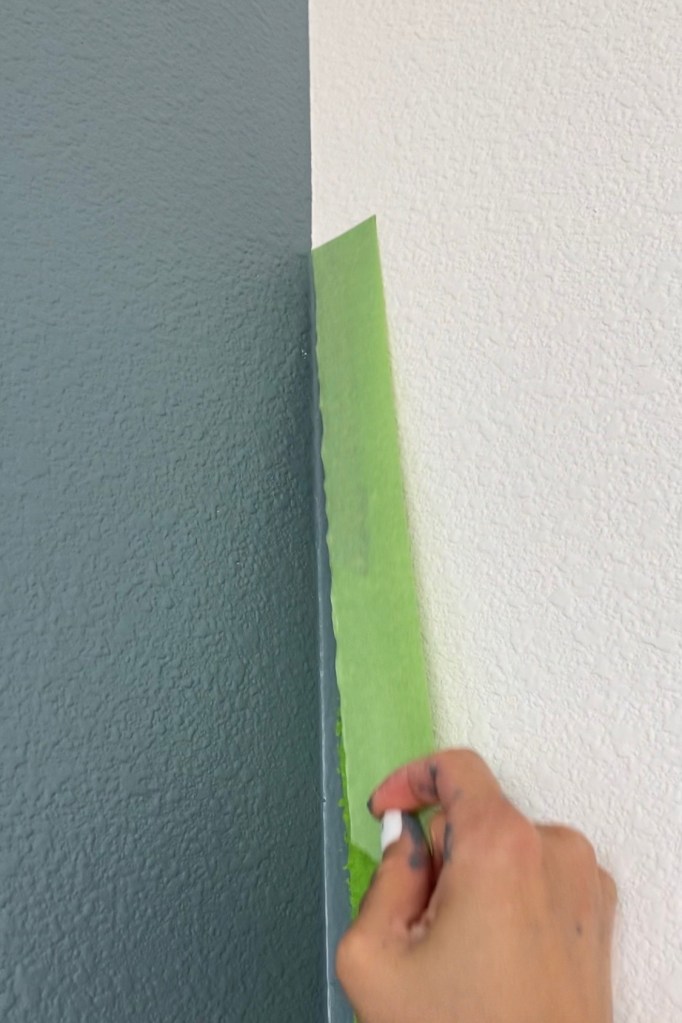
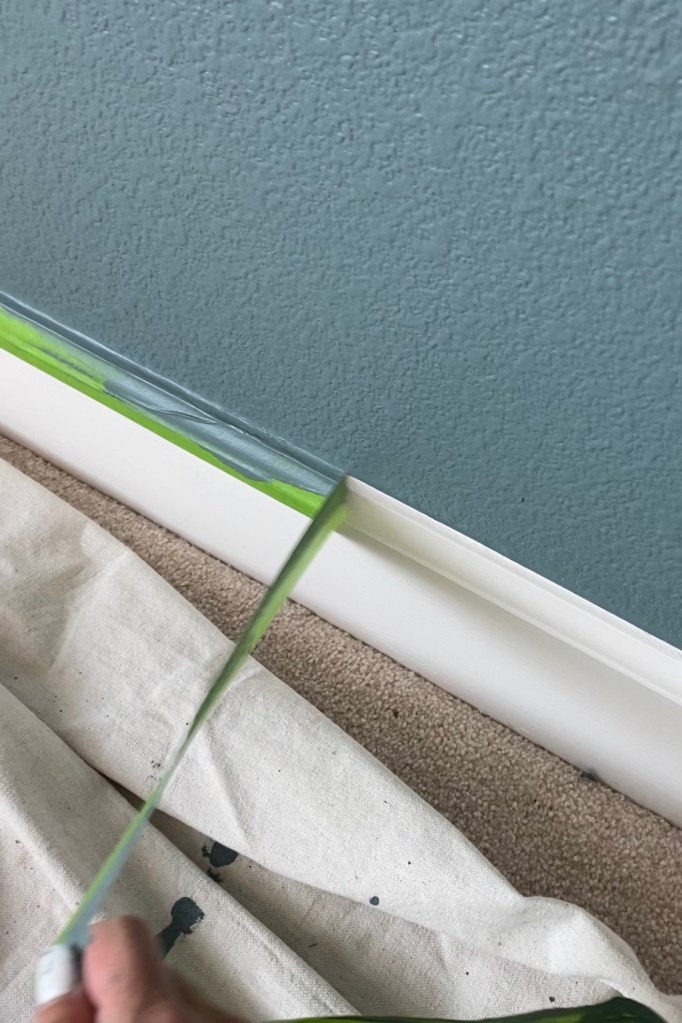
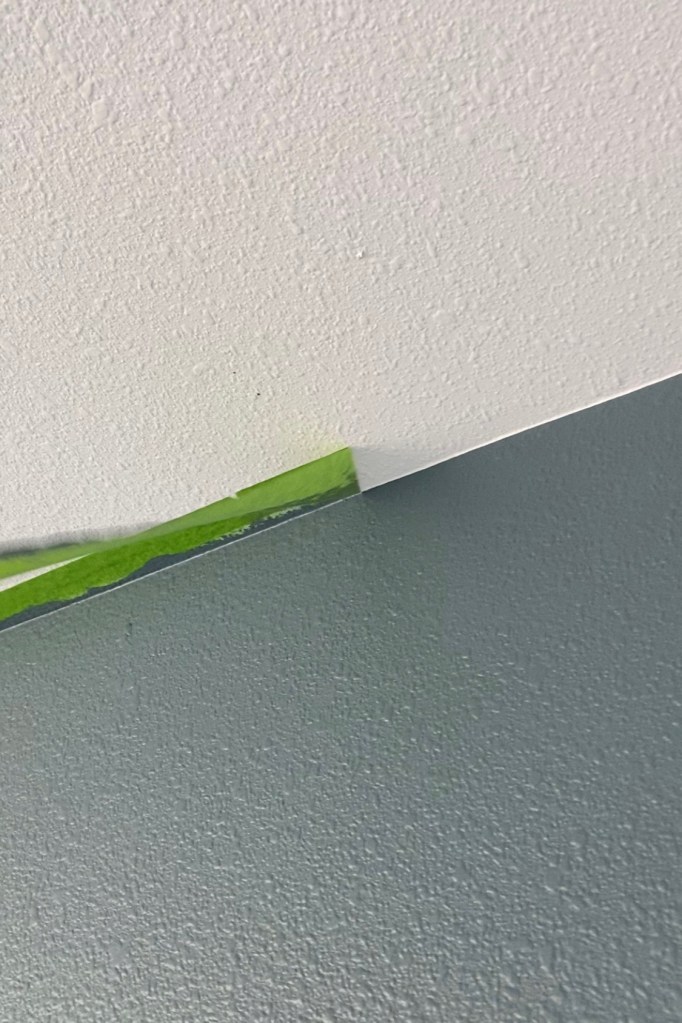
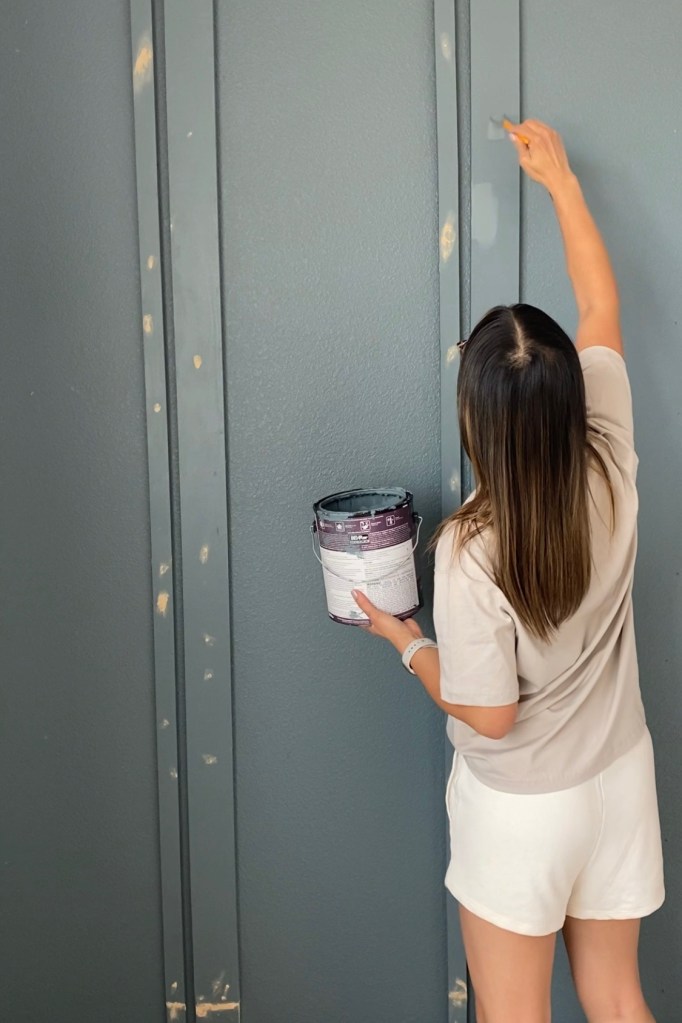
Before installing the wood panels, I had to paint the wall. I taped the baseboards, edges, and ceiling to keep those white (Sherwin Williams Snowbound). Then I painted the entire wall with 2 coats of Behr Coney Island, a muted blue/green. THANK YOU to all of you who helped me pick a color on my Instagram poll! The 49% vs 51% split between Behr Ocean Swell (charcoal blue) and Behr Coney Island did not make the decision any easier for me to make! Ultimately, I decided to go with Coney Island to add some color and liveliness to our home while still creating a serene and relaxing space. Let me just tell you now… I am LOVING this color! Absolutely LOVING it!
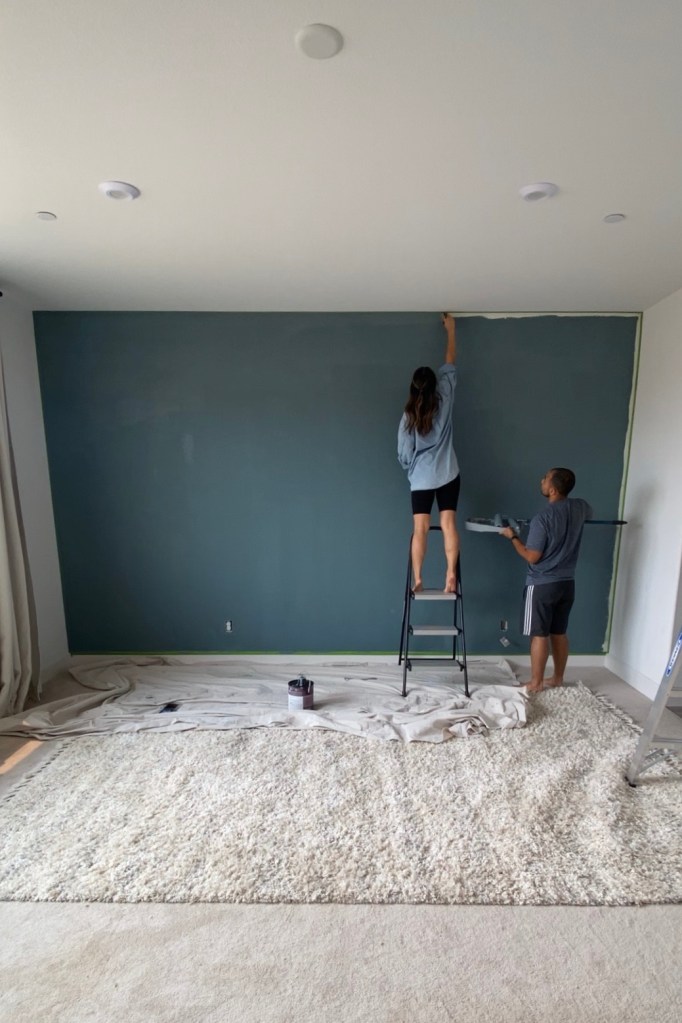
( with my assistant Vince)!

While waiting for the paint on the wall to dry completely, I painted the wood panels. Is it sad that my arms were sore the next day from all the painting?
Next, I removed the tape and was pleased to find clean and crisp paint lines! Is there anything more satisfying than that?
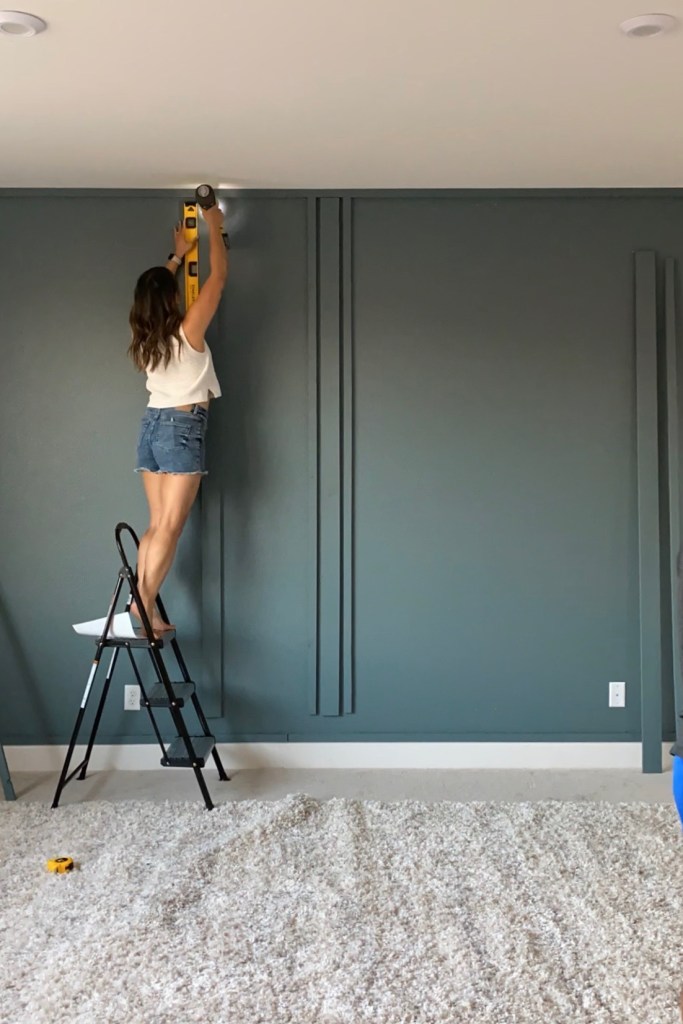
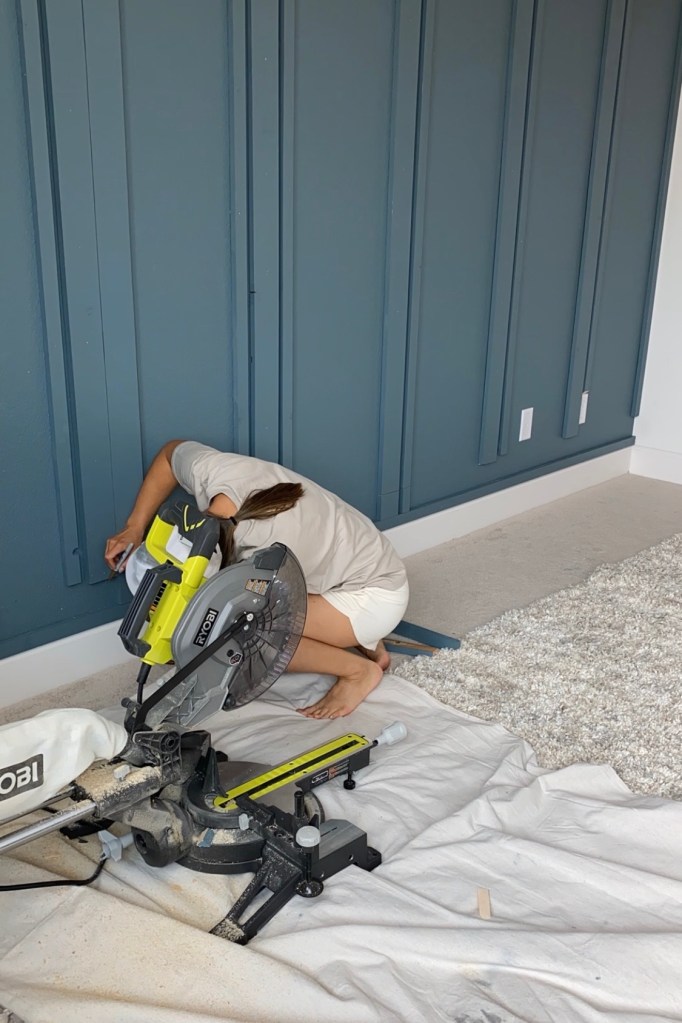
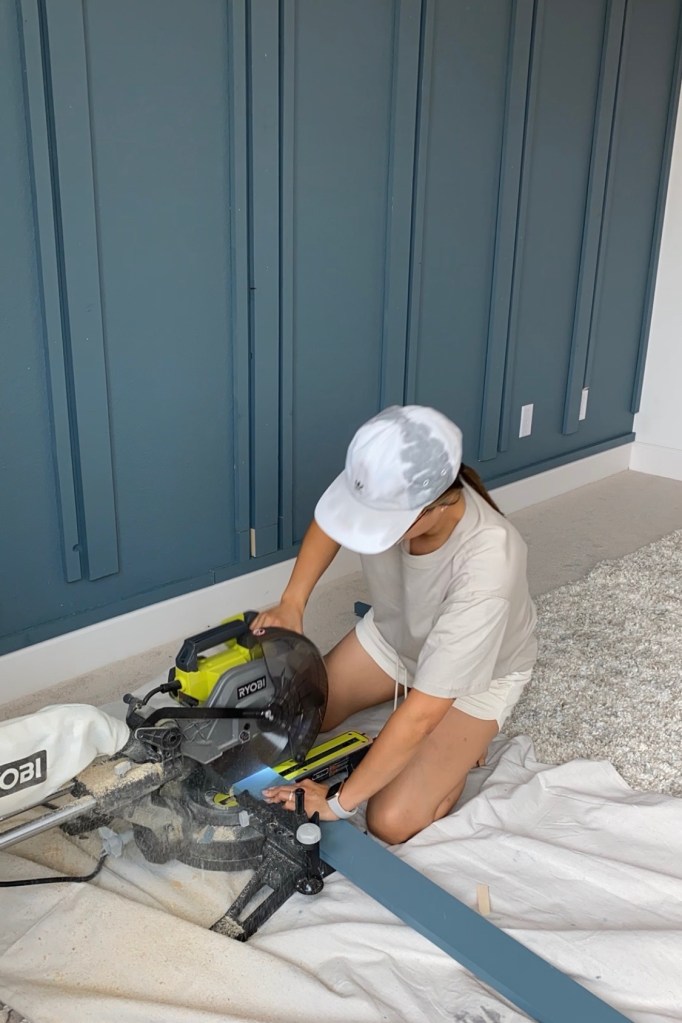
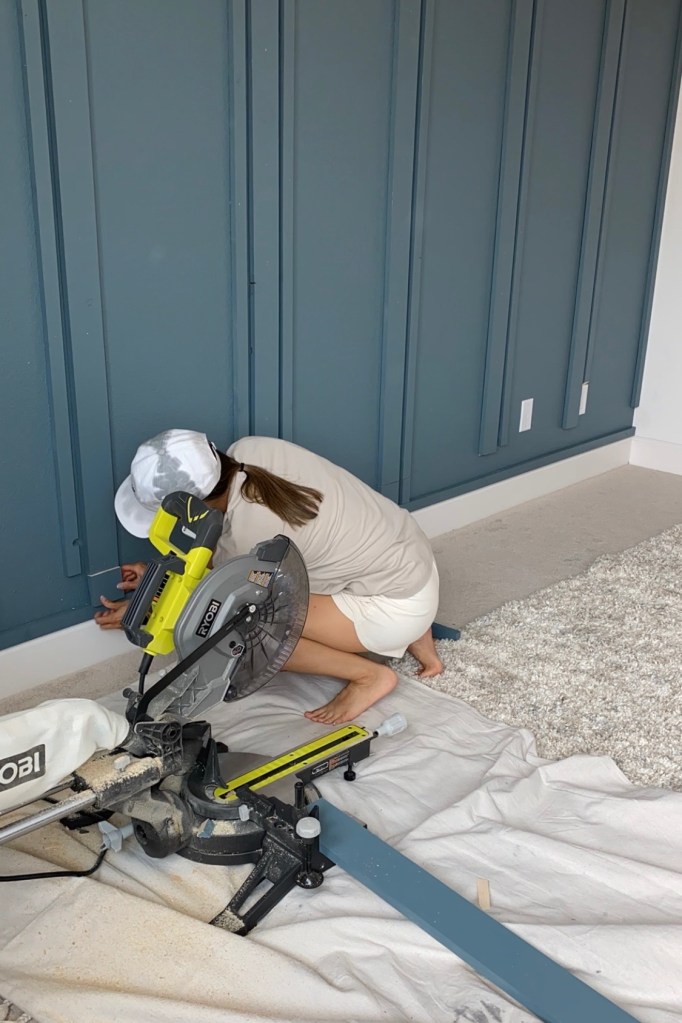
The next day, I began nailing my boards to the wall. I started with the borders/frame of the wood panel accent wall: a horizontal piece above the baseboard, a horizontal piece along the ceiling, and a vertical piece along each adjacent wall. I had to trim the horizontal pieces with my miter saw for them to fit the length of our accent wall.
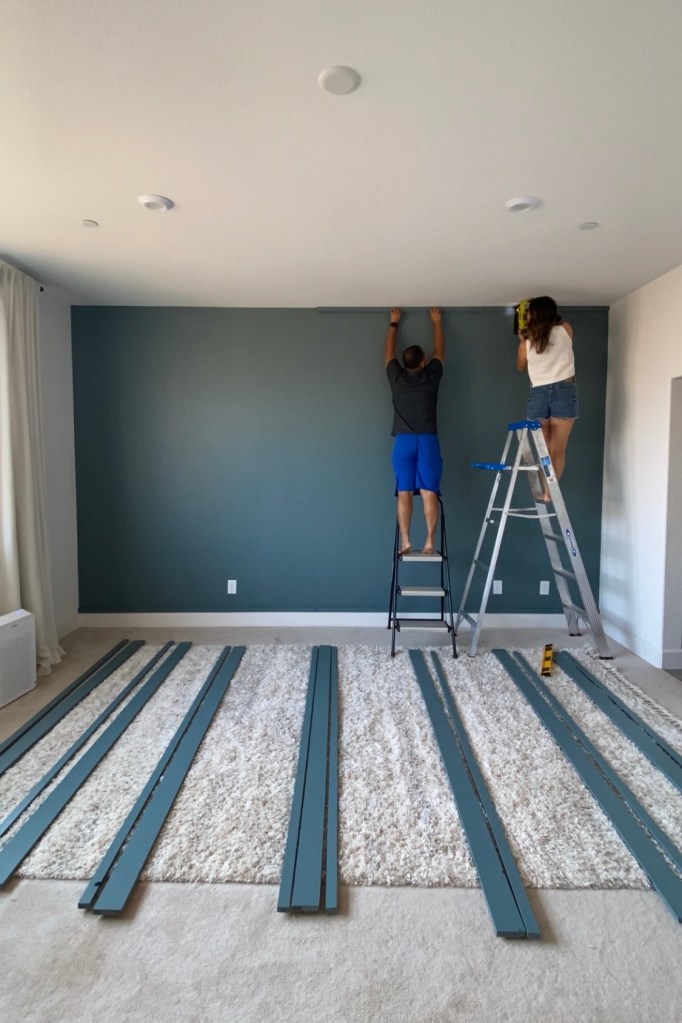
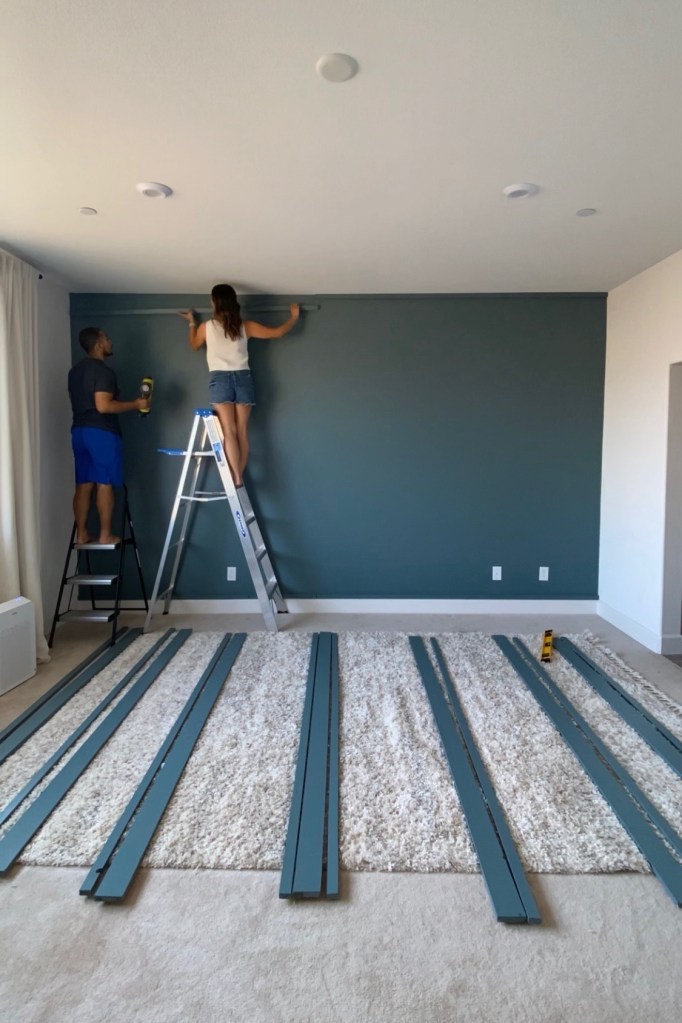
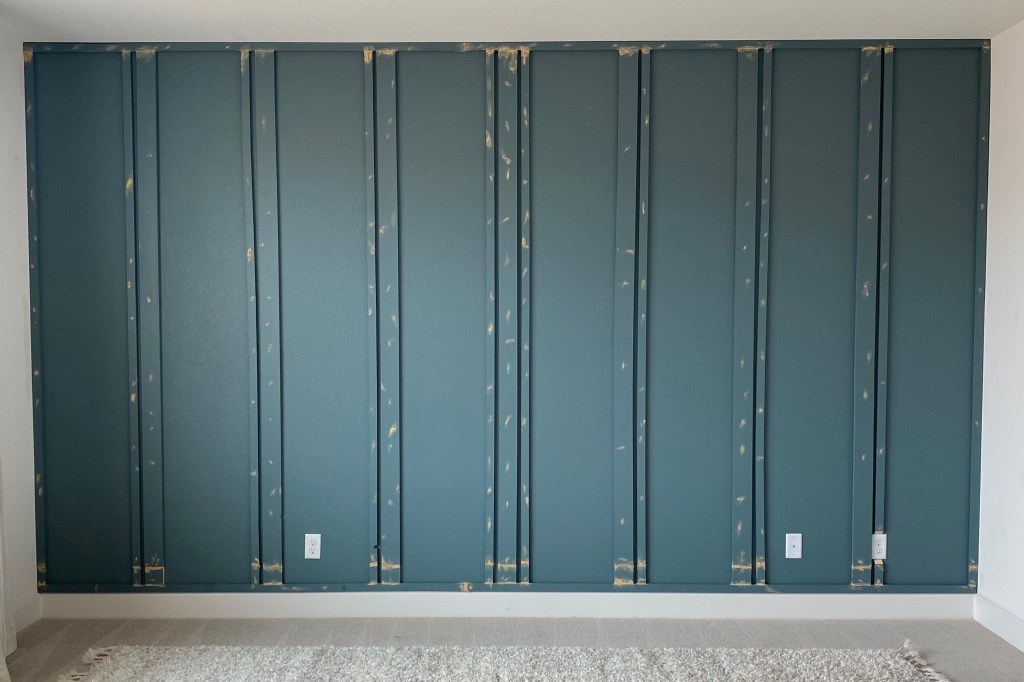
For our desired wood panel pattern, I started with a 3 piece wood panel grouping in the center with two narrow 1″ x 2″ pieces surrounding a wider 1″ x 4″ piece. All other wood panel groupings would include one 1″ x 2″ on the outside and one 1″ x 4″ on the inside so that the pattern would bring the focus to the center of the room.
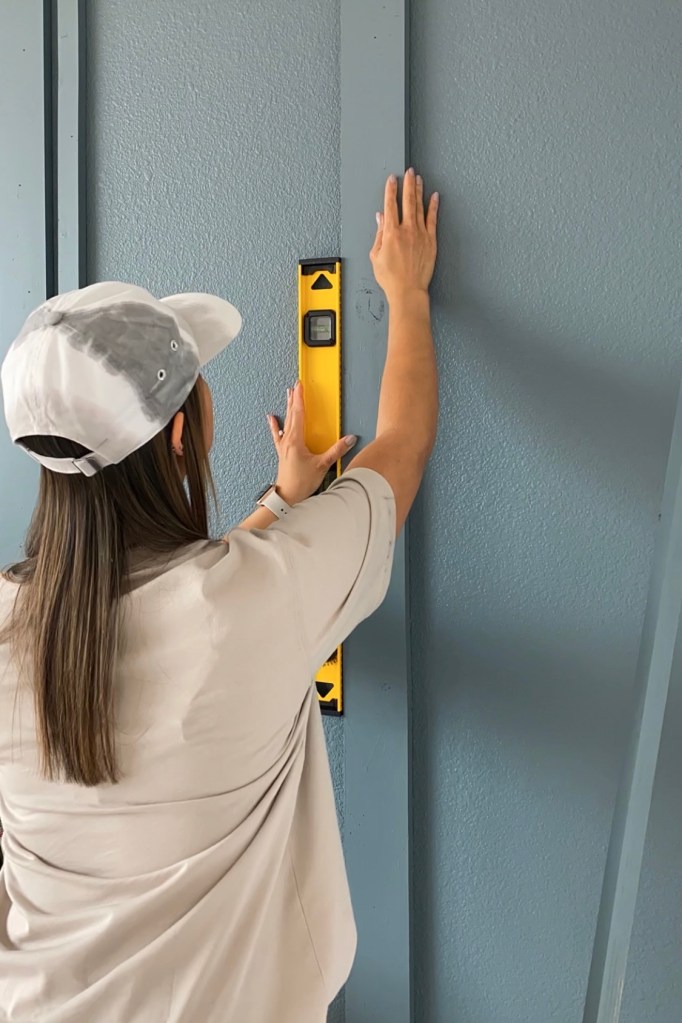
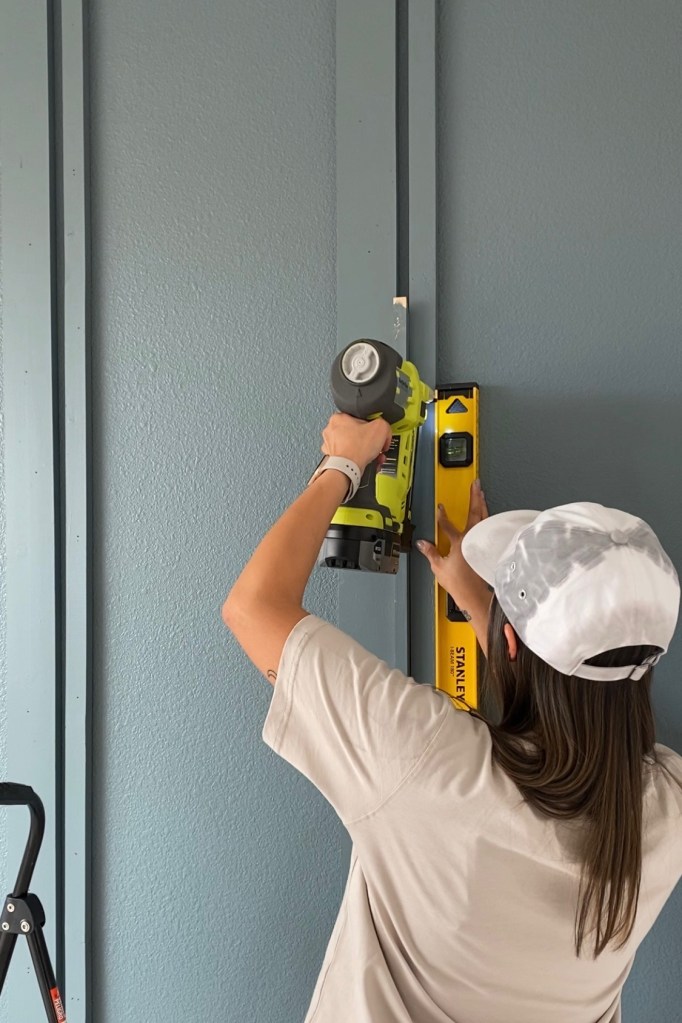
To install the wood panels, we measured the length of the wall and divided it by 2 to find the center. We used our brad nailer to nail the first 1″ x 4″ piece to the center of the wall while carefully making sure that this piece was level. Then we nailed the other 1″ x 2″ pieces to each side of the center 1″ x 4″ piece, using a 1″ x 2″ piece (turned on its other side) as a spacer, and double checking that each piece was level.

Prior to installing the other pieces, I had to make some calculations… SKIP THIS NEXT PARAGRAPH IF YOU’RE NOT INTERESTED IN THE MATH.
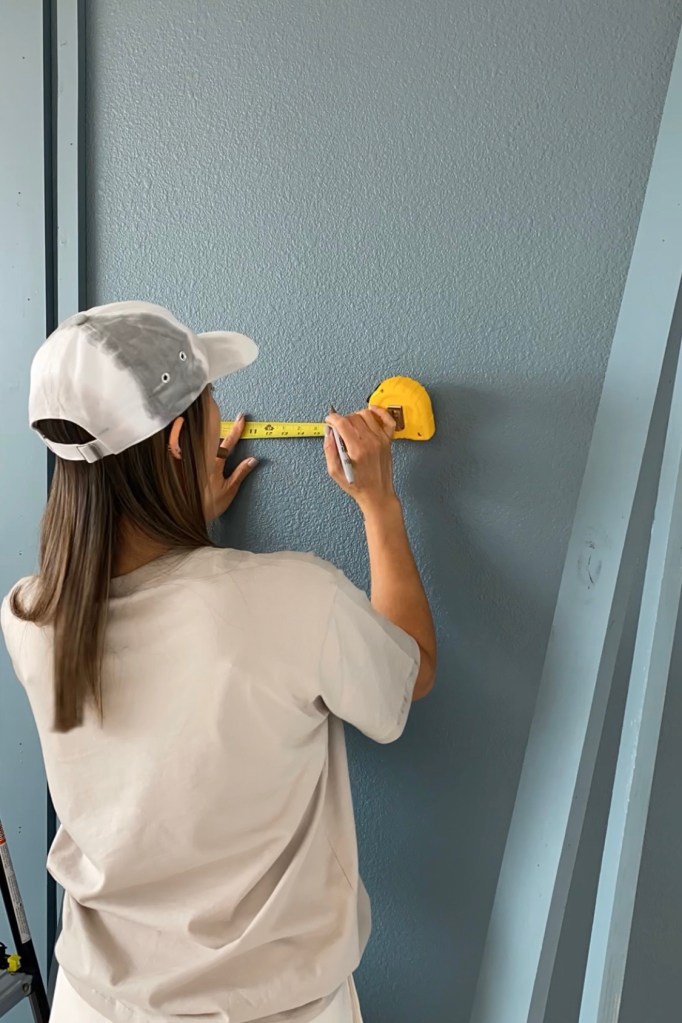
To summarize, I measured the width of each wood panel grouping (a 1″ x 4″ and a 1″ x 2″ properly spaced with another 1″ x 2″ turned on its side). I also measured the length of the wall from inside of the vertical borders on each side to the side of the center wood grouping on that specific side of the wall. I’m going to call this wall space that doesn’t include wood panels the “empty space.” There is one large empty space to the left of the center wood panel grouping and another large empty space to the right of the center wood panel grouping. I planned to have 7 wood panel groupings total with 3 on each side of the center pieces in the “empty space.” I multiplied the width of the wood panel grouping by 3 (to represent 3 groupings on each side). Then I subtracted that number (width of wood panel grouping x 3) from the length of the each “empty” space” on each side of the center wood panel grouping. That number represents the total length of the remaining “empty space” on each side of the center pieces, without taking into account that this length will be divided into 4 parts. To find the exact length of the “empty space” I need between each wood panel grouping for an evenly spaced design, I divided the length of the “empty space” on each side of the center wood panel grouping by 4 (for 4 spaces separated by 3 wood panel groupings). Does that make sense? I tried to explain it as clearly as possible… but I admit that it does definitely sound very confusing. Maybe I’ll draw up my measurements and post a photo of it here sometime soon.
I cannot stress this enough… DOUBLE/TRIPLE CHECK your calculations and measurements. Have someone else double check it too! I wasn’t careful with my calculations initially (I divided the length of the “empty space” by 3 instead of dividing it by 4) and nailed the boards too far away from the previously-nailed boards. We had to pull the boards out, remove all of the nails (there were a lot…) and redo those sections. What do people say? “Measure twice, cut (or in this case, nail) once.”

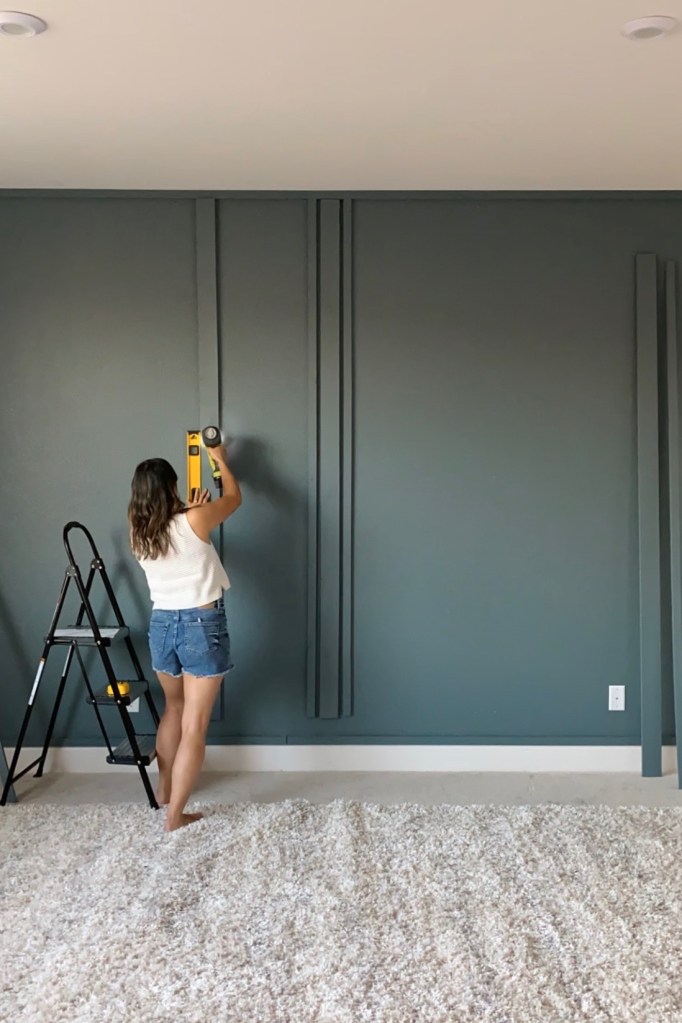
Once I had everything calculated, it was just a matter of measuring each space, nailing the 1″ x 4″ board while making sure it is level, and nailing the 1″ x 2″ on the outer end while spacing it out with another wood board and making sure each piece was level.

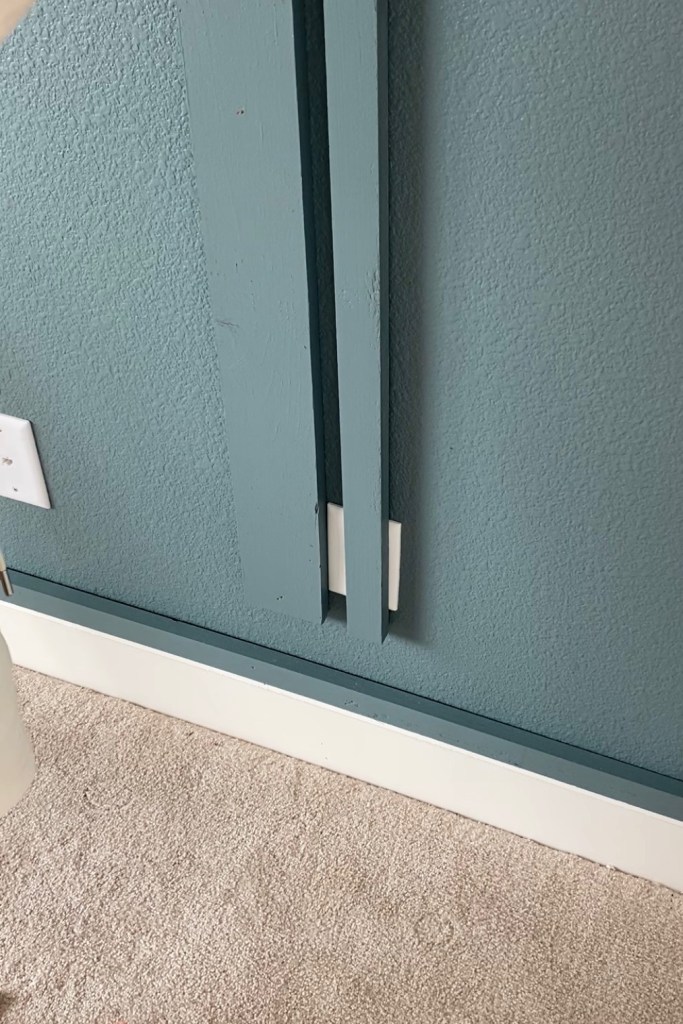
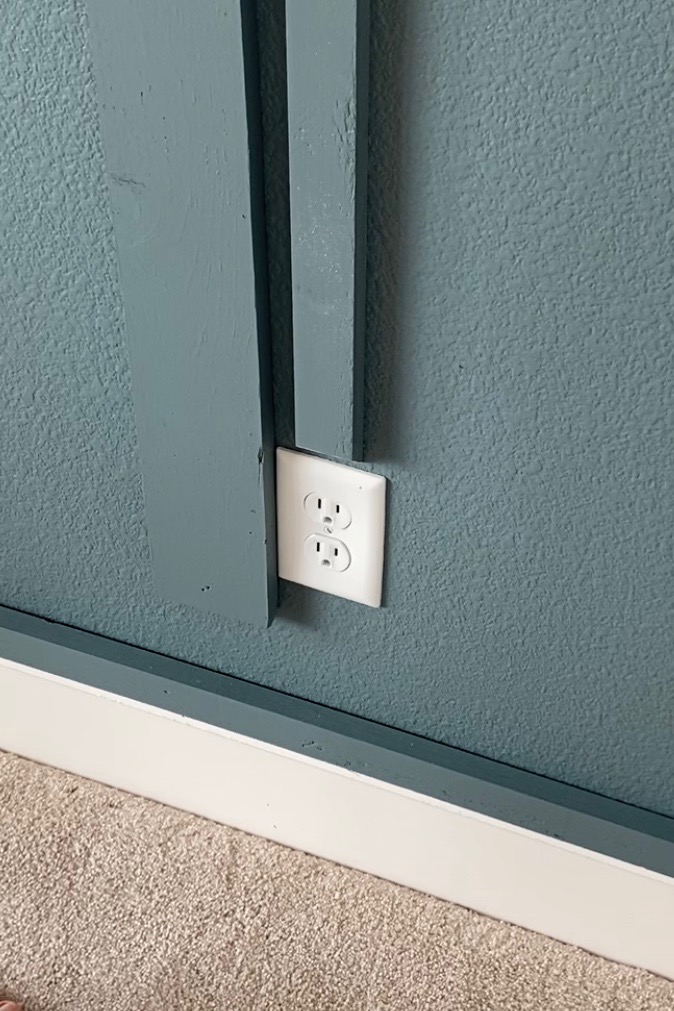
Unfortunately because of the spacing of my wood panel groupings, one of the 1″ x 2″ pieces aligned perfectly with an outlet. To fix this issue, I marked the 1″ x 2″ where it meets the edge of the outlet and trimmed it with my miter saw.

Because common boards are usually 8′ in length and my walls are 9’ tall, my wood panels didn’t quite extend across the entire height of the wall. Even with the baseboard and the frame that I installed earlier, each board was just a few inches shy of reaching the other end… So I painted some extra wood, measured each space, cut the boards accordingly, and nailed the smaller pieces to the wall to fill in that space.
Next, I filled in the gaps, nail holes, and wood defects with wood filler.
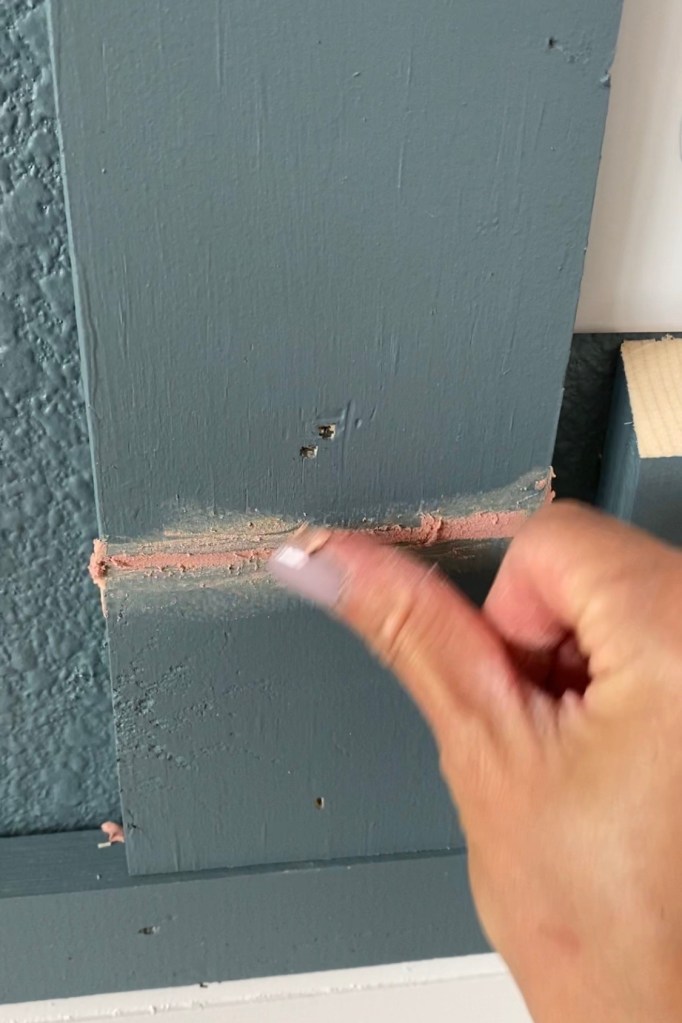
Once the wood filler was dry, I lightly sanded it down to create a smooth surface and painted over each section.
Now I’m just waiting for some new furniture to arrive in order to show you a full reveal of our primary bedroom makeover. Stay tuned!
Until next time,
Emily

Wow! Impressive!
LikeLiked by 1 person