
After dealing with the heartbreak of losing two grandparents in a span of 30 days, I needed a small and simple project to get back in the groove of DIYs. The water closet in our primary bedroom was the perfect project to provide some distraction and a sense of control over the things without making me feel overwhelmed.
I knew that I wanted a moody color for this space. After testing a few peel and stick swatches from Clare, I chose the color Irony, a dark gray with a subtle tint of blue. This project may have been sponsored by Clare, but I’ve become a big fan of their brand and their mission. Not only is Clare a black-owned company, but it also provides a more health-conscious option for home projects. Clare offers zero VOC paint, which means that the paint releases no hazardous air pollutants, no toxic air chemicals, and no EPA chemicals of concern… which is ideal when painting a small space with minimal ventilation.
I began by prepping the the walls for paint. I wiped down my walls using a wet washcloth and taped the corners using Clare’s painter’s tape.

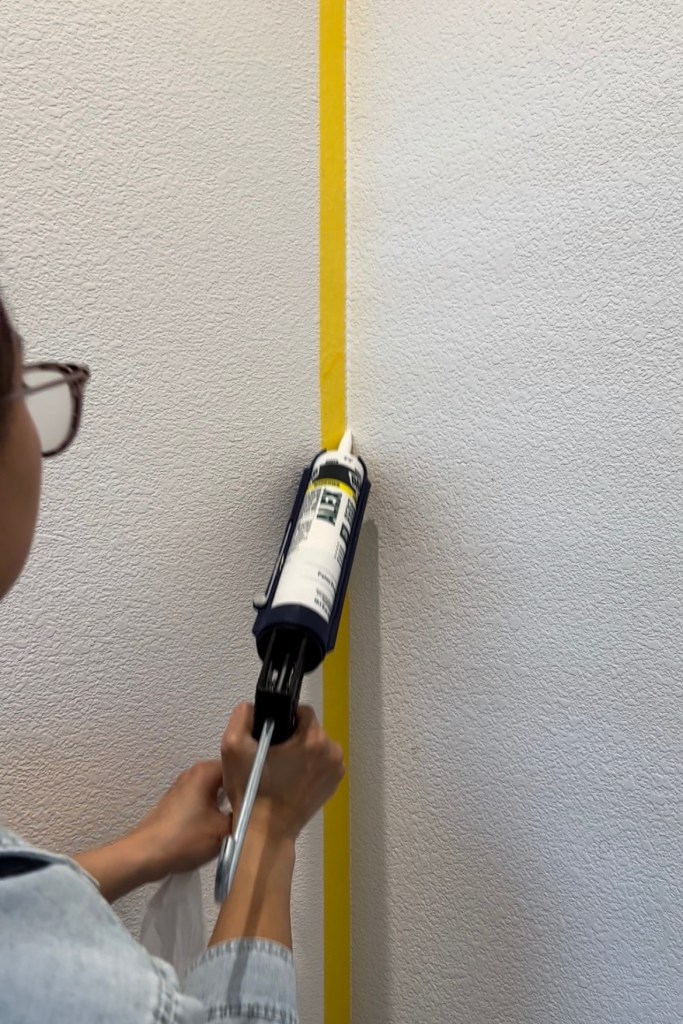
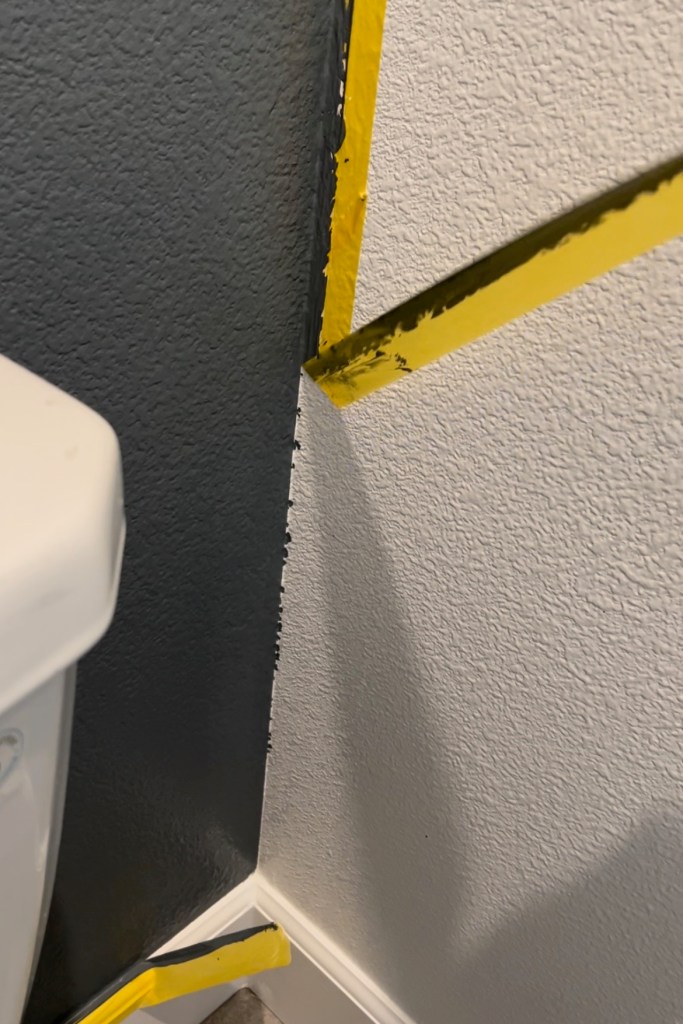
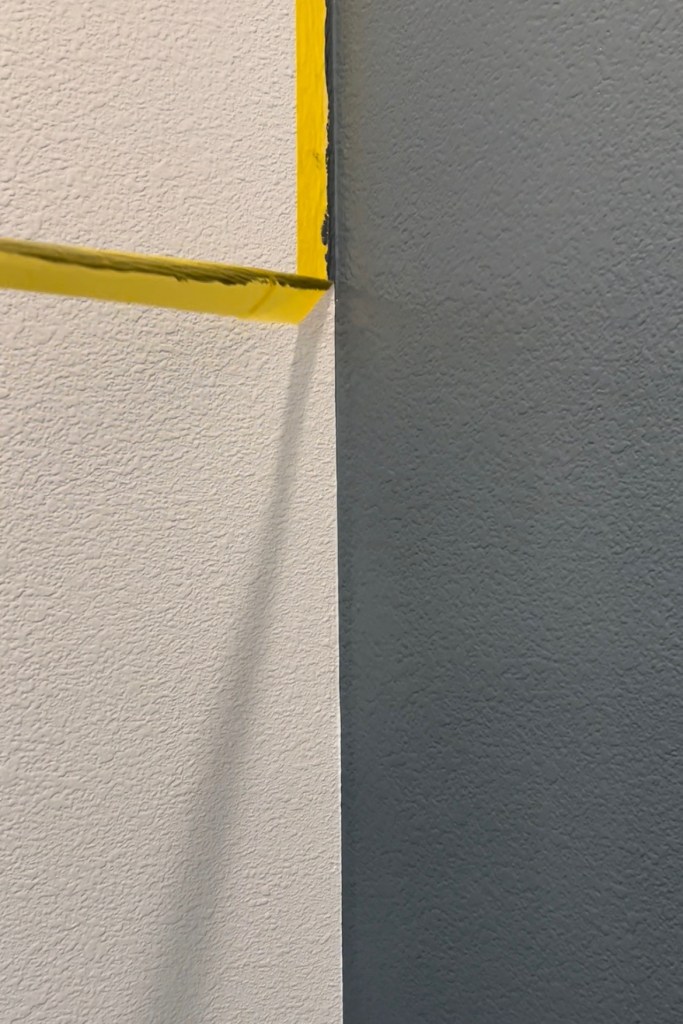
Although painter’s tape does a decent job of creating a border between two paint colors, caulk is the real MVP and creates the cleanest and most crisp paint lines. As much as I may press my painter’s tape against the wall for a tight seal, there are often miniscule air bubbles that aren’t visible, especially when working with textured walls. Paint bleeds into to those tiny spaces, creating an uneven line.
This is where caulk comes in and works its magic. Caulk is a thick, rubbery substance that is often used to seal cracks, gaps, or joints between two items to create a smooth transition and give the illusion that two items are a perfect fit. It’s most often used to seal the tiny gap between your wall and countertop, your wall and baseboards, or trims/mouldings around your home. To create a clean paint line, I applied caulk along the edge of my painter’s tape on the wall that I was preparing to paint. I ran a baby wipe or wet washcloth over my line of caulk and smoothed out the layer of caulk. By doing this, I filled in those tiny gaps with caulk so that paint couldn’t bleed through.
Keep in mind that this technique only works if your adjacent wall is white (so the caulk can blend in with the existing paint color). For colored walls, I’d recommend painting a layer of the existing wall color (rather than applying caulk) over the edge of the tape on that wall that you are preparing to paint. This will also fill in the small gaps and seal that space between the tape and the wall. Once that layer is dry, paint over it with your new paint color.
I repeated these steps for each corner/edge, the ceiling, and the baseboard. It may seem like a tedious and unnecessary step after applying painter’s tape, but I promise that it’s worth the extra work.
Would you be interesting in reading a blog post with details on these paint techniques?

Next, I began painting!

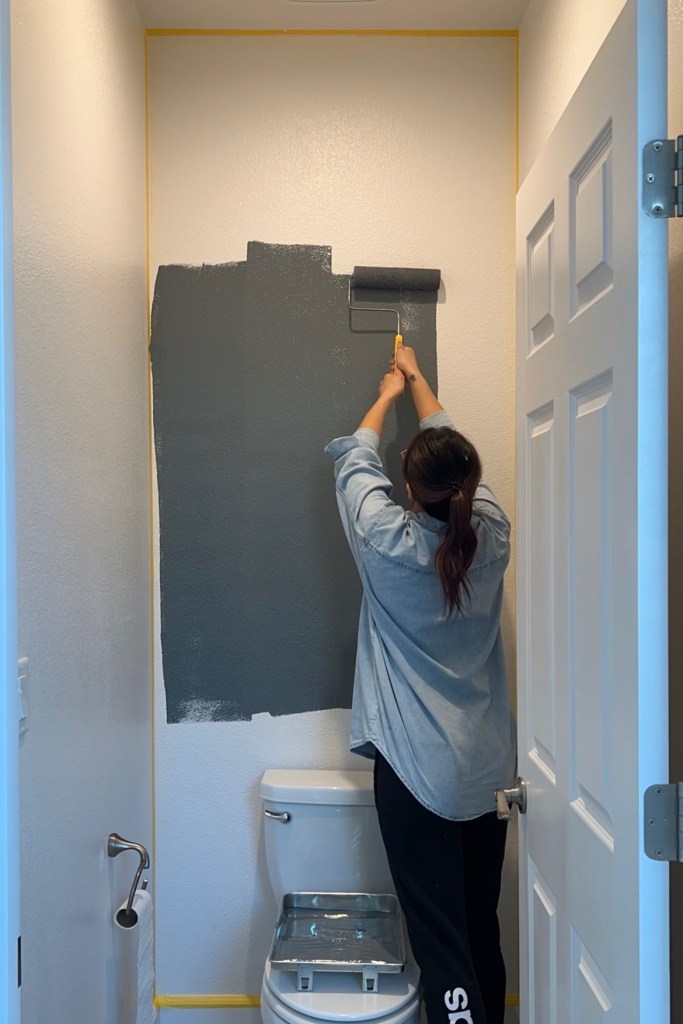
While getting lost in an audiobook and the repetitive up and down motion of painting, I accidentally tilted my paint tray a little too much and spilled some paint… and when I say “some,” I really mean, “A LOT.” The following photos do not do the spill justice. It was all over the toilet seat and the floor surrounding the toilet. Paint dripped down my shirt as I left a trail of dark gray footprints to the sink Oops… I guess I should have used a drop cloth. At least I was wearing my shirt dedicated to painting!
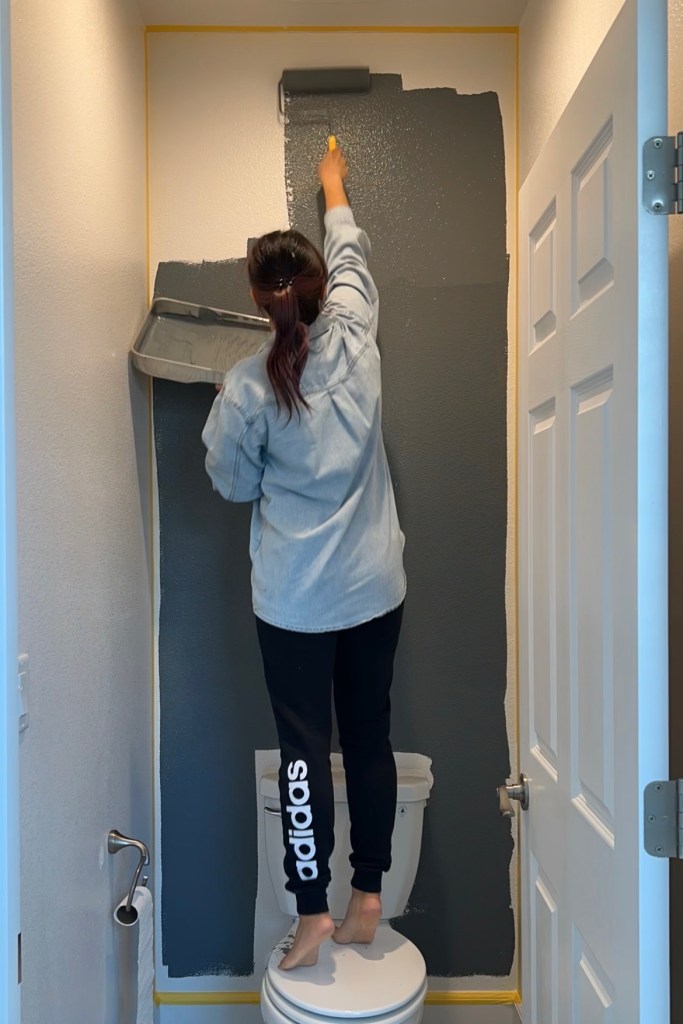
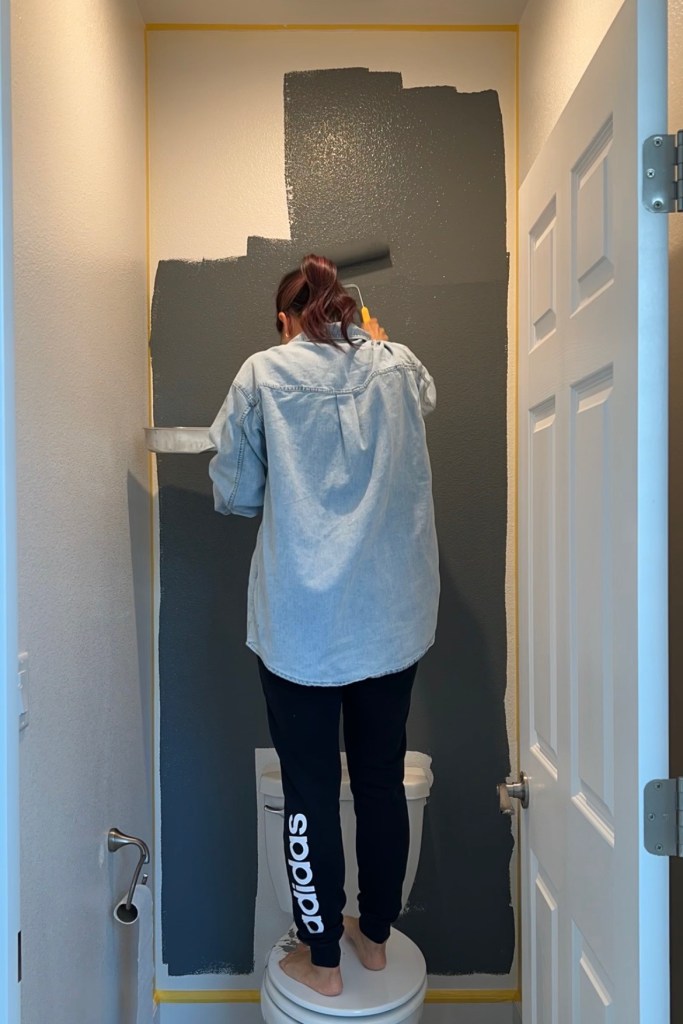

Thirty minutes and a whole roll of paper towels later, the floor was spotless, and I continued painting as if nothing happened.

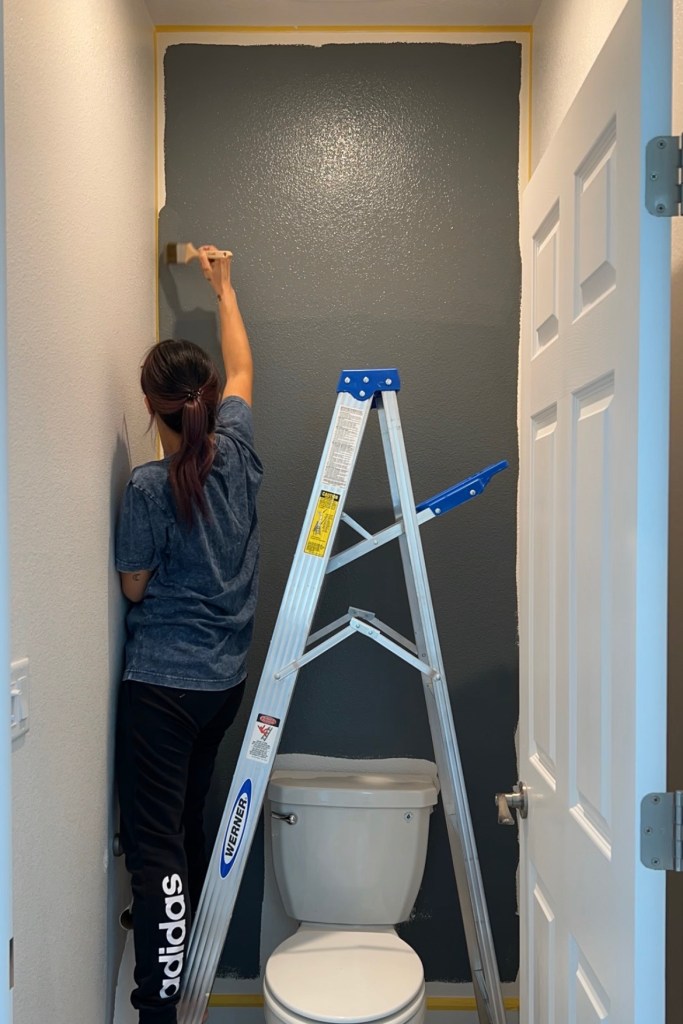
My ladder wouldn’t open completely.
I’ve heard that some people go through the trouble of removing their toilet to paint the wall behind it. I can’t even imagine going through all that! To reach that difficult spot, I simply used this Paint Behind Tool from Amazon. It’s basically a stick with a thin sponge on one end… I added some paint to the sponge side and gently brushed the tool along my wall behind the toilet. What a simple and genius solution!


Then came my favorite part… Tape removal! I wanted to show you all the difference between using only painter’s tape (no caulk over the edge) and using painter’s tape with caulk. The difference is undeniable (see photos below). Isn’t is crazy what that extra step during the paint preparation process can do? I ALWAYS use this caulk method when painting now.
Next, I built my wooden shelf. I didn’t want to spend more money on wood when I had a bunch of scrap wood sitting in the corner of our garage so I picked up two pieces of red oak plywood that were left over from my over-ottoman coffee table project. I screwed the two pieces together using wood glue and pocket holes and cut my new shelf top to my preferred size (9″ x 39.5″). In an ideal world (and what I’d recommend to you), I would have purchased a piece of pre-cut oak board at the store (between 6″ – 10″ wide, depending your desired shelf size) and cut that down at home using a miter saw… but I’m glad that I was able save myself some money and allocate those funds elsewhere.
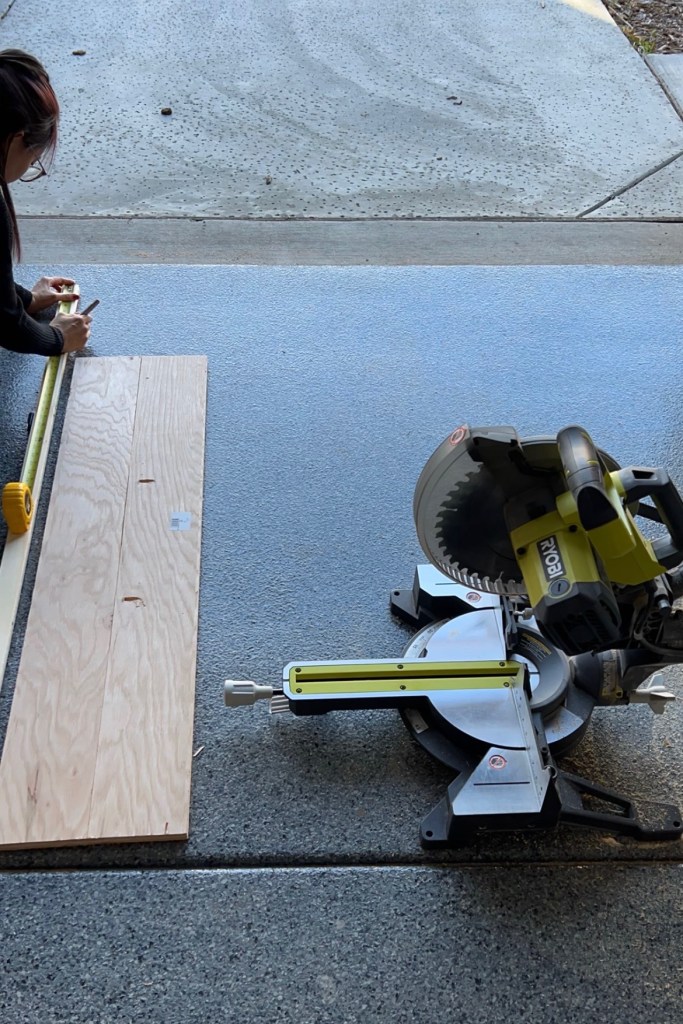


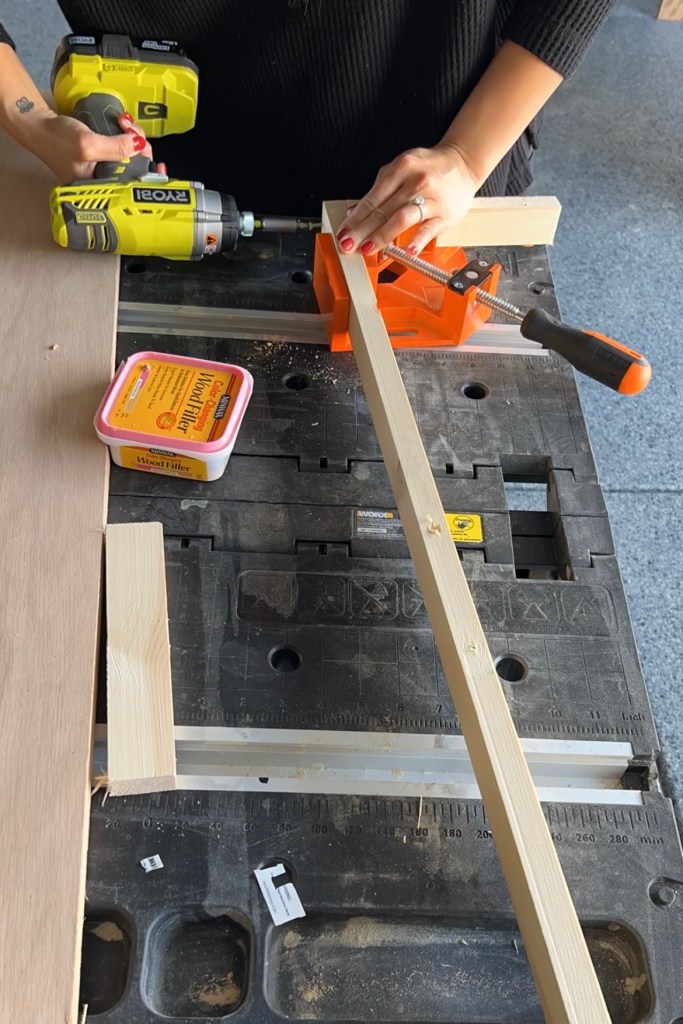
I cut some 1x2s boards, one to the length of our toilet wall (39.5″) and two others a couple of inches shorter than the width of my shelf (9″) using my miter saw. Next, I screwed the three 1x2s into a C-shape to create a bracket/support for my shelf and used my corner clamp for a perfect 90 degree angle.

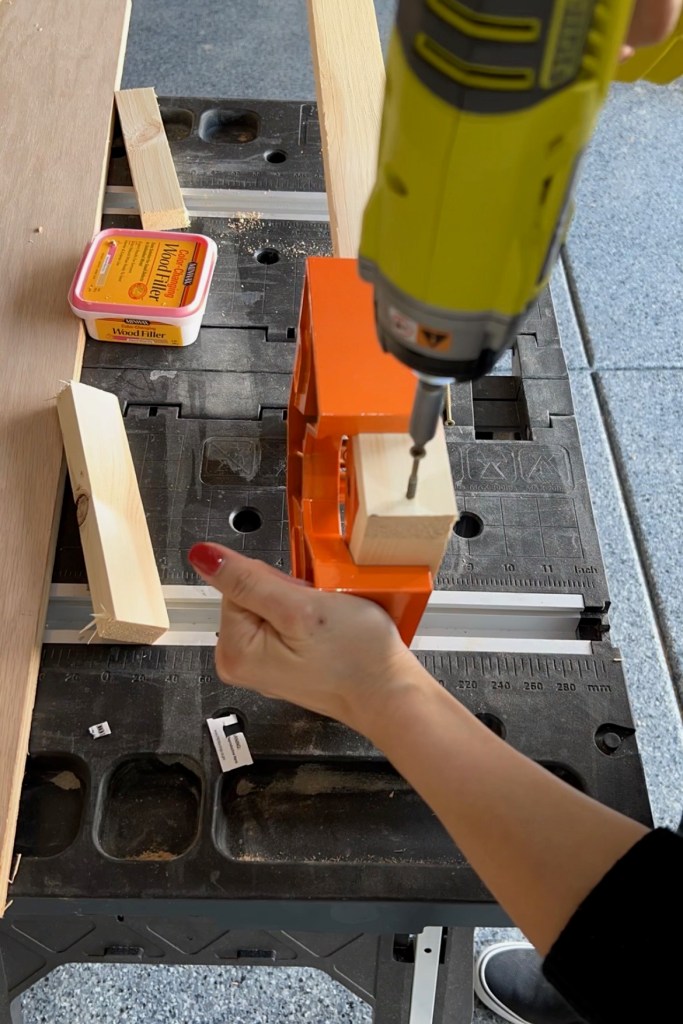


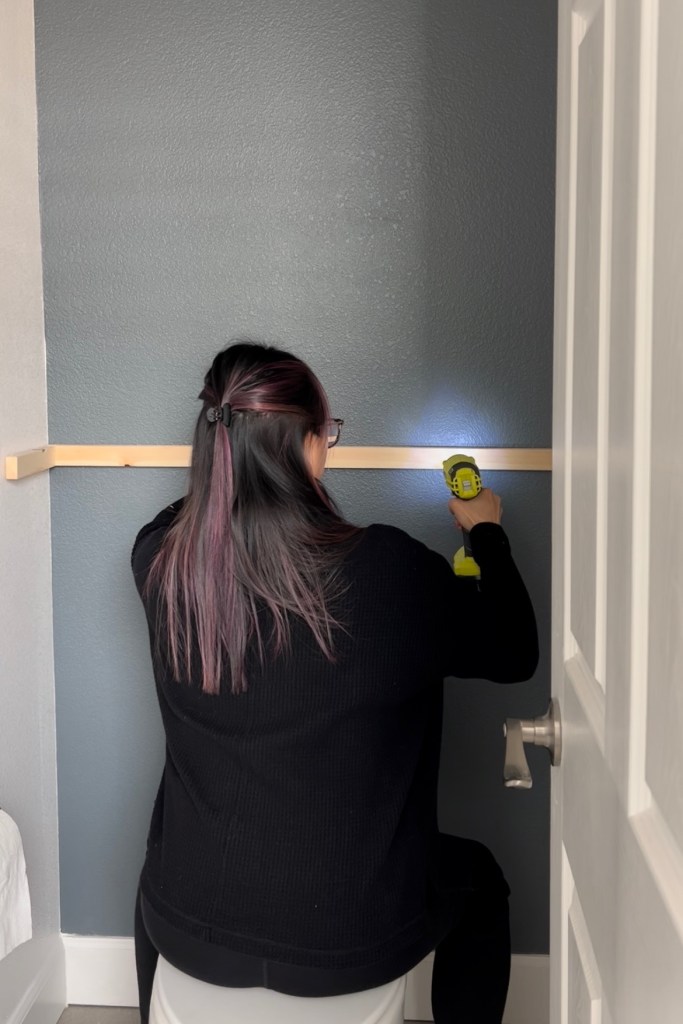
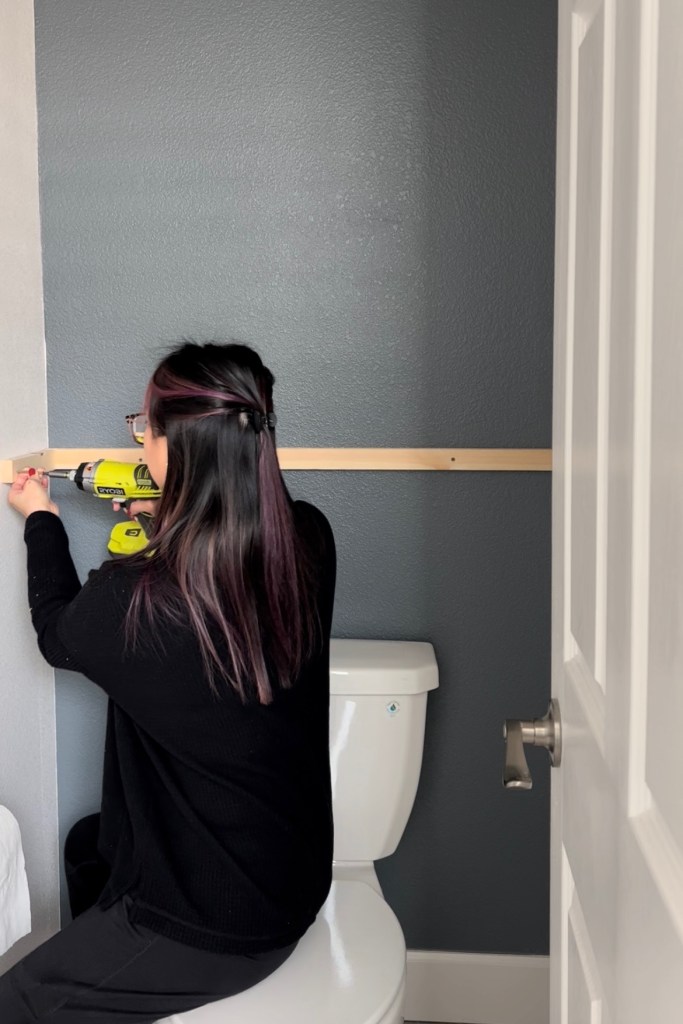
I screwed my C-shaped bracket to my wall while making sure it’s level. To do this, I screwed one side of the bracket to the wall at my preferred height, brought the other side of the bracket to position using a level, and secured that side to the wall too. I screwed the sides of the C-bracket into the studs of the adjacent walls.

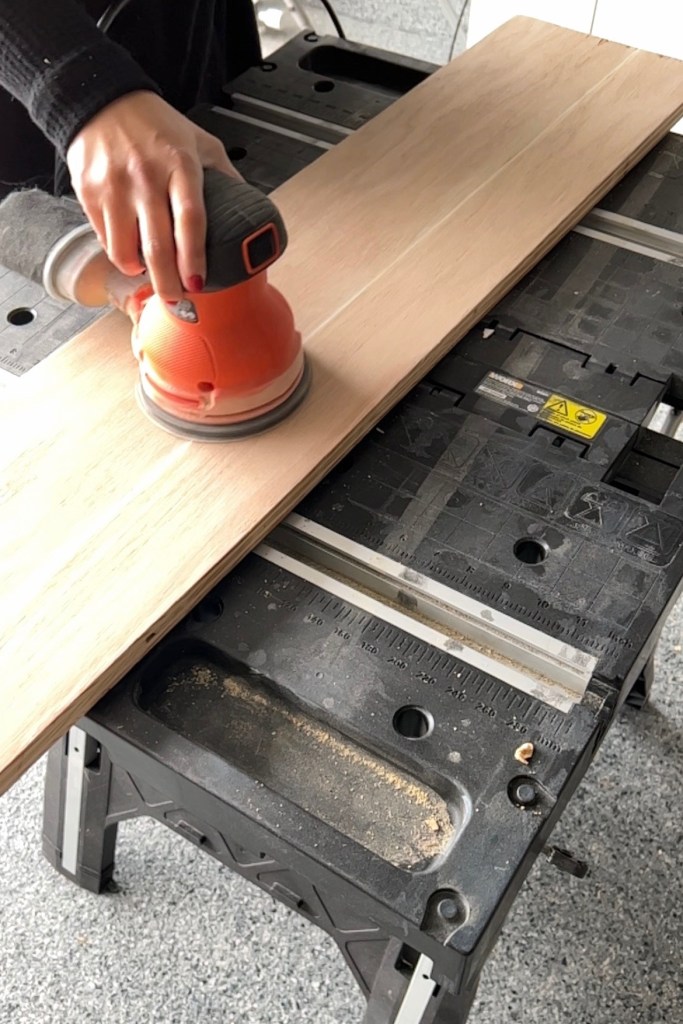
I sanded down my red oak shelf using orbital sander with 80 grit to remove imperfections, then 120 grit to smooth it out, and 240 grit for a finishing touch and applied wood conditioner to prepare it for wood stain.
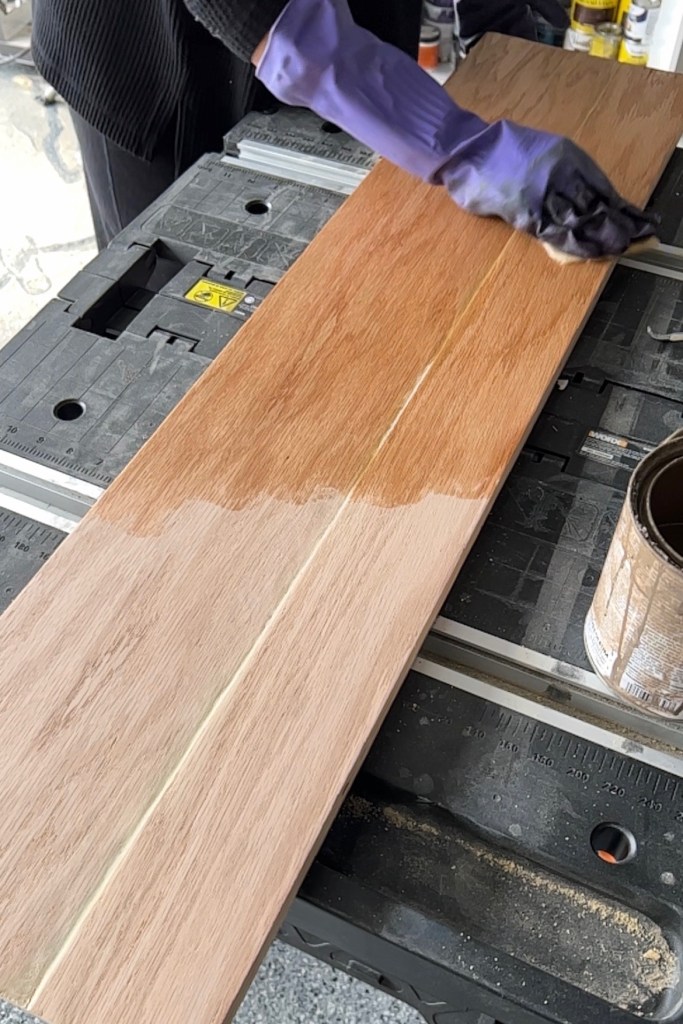
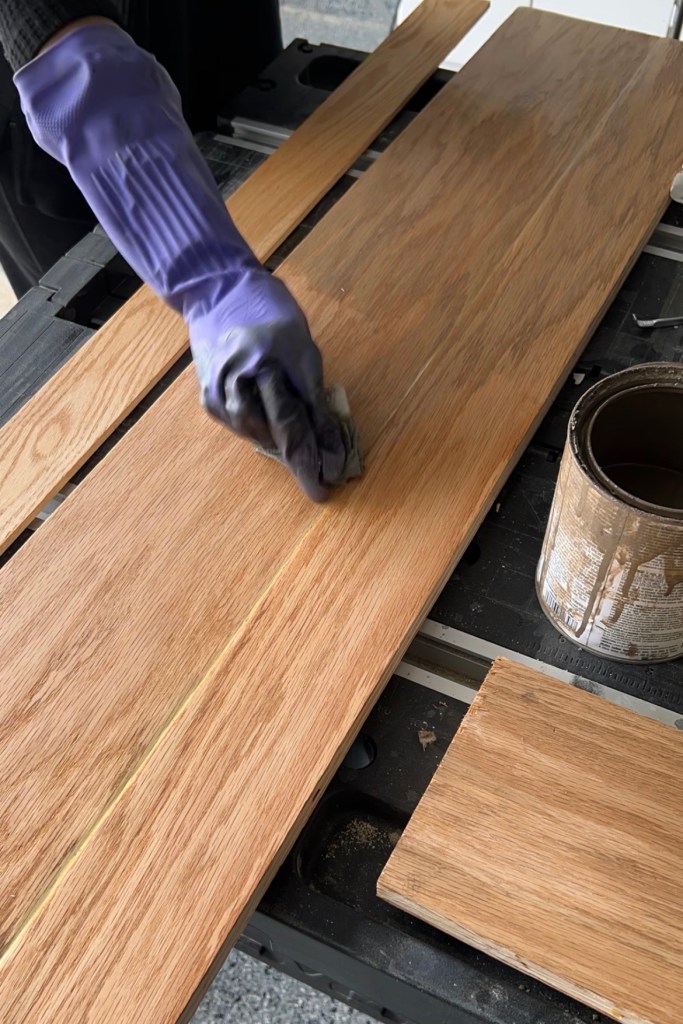
I added a few VERY thin layers of Varathane Classic Gray Stain but felt that the warm tones of the red oak were still coming through. I ended up using a thin layer of Minwax Slate Stain for a cooler tone. For both stains, I applied a very thin layer and wiped it off immediately to prevent oversaturation.
I repeated these steps on a thin 1×3 piece of red oak trim.

Once the stain was dry and didn’t smell as toxic anymore (~ 3-4 days), I rested the stained board on top of my bracket and nailed it into my bracket using my brad nailer.


I nailed my 1×3 board to the front of my shelf to cover the bracket and plywood edge. Eventually, I plan on nailing a .25″ thin piece of red oak plywood to the bottom of the shelf to cover the bracket from the bottom view… but for now, out of sight, out of mind. I mean… How often do I get down on the floor of my water closet and look up at the bottom of the shelf anyway?
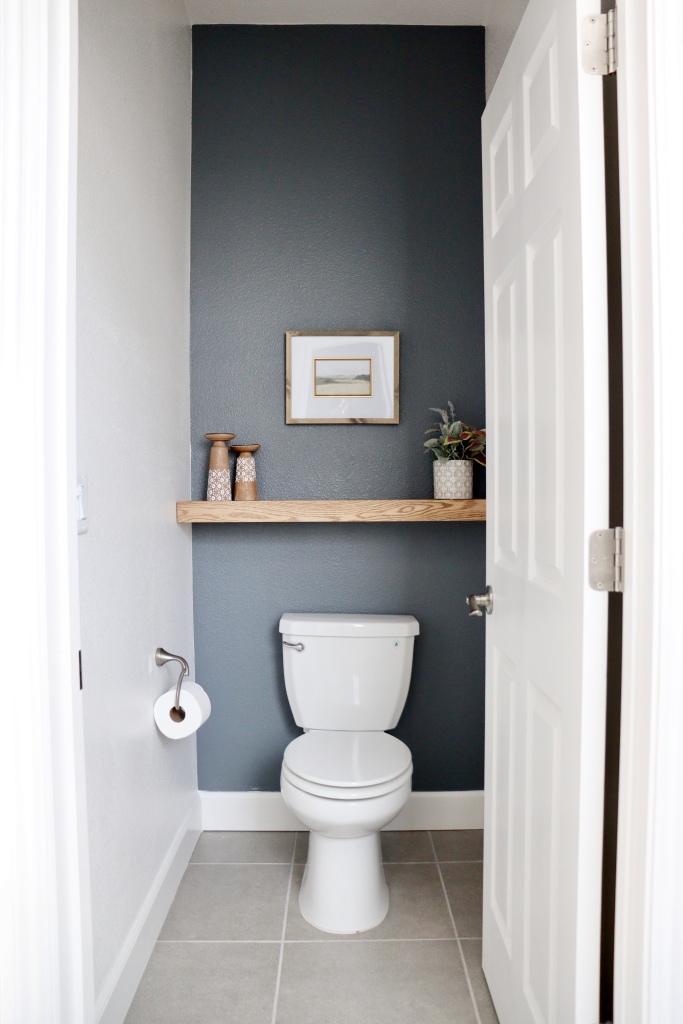
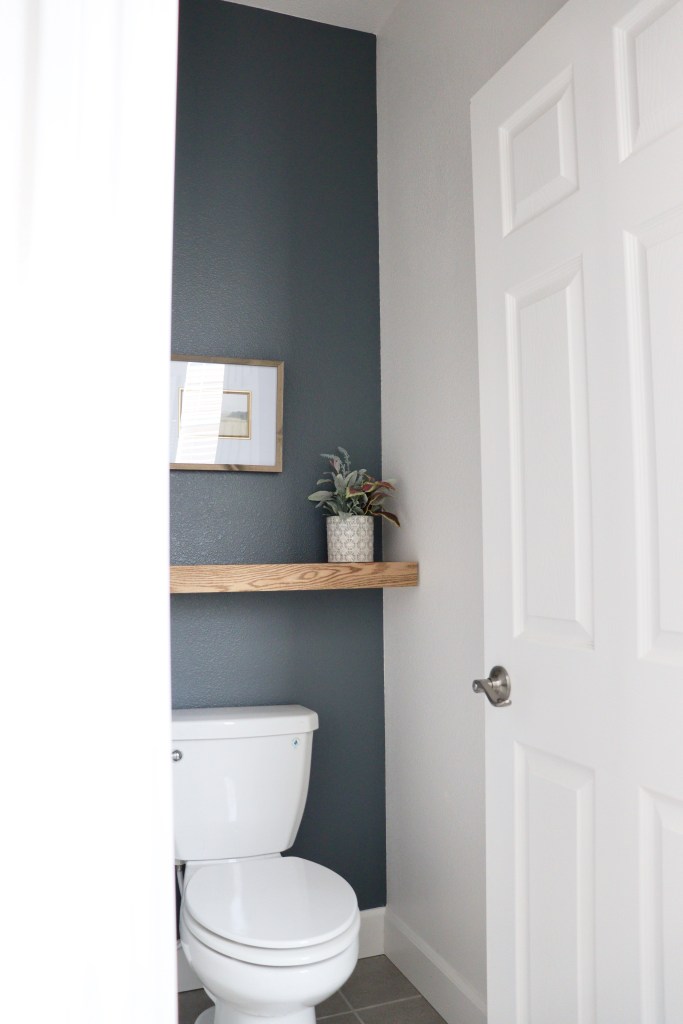
Once I the shelf was secured in place, I completed the space by adding decor that I’ve collected from Hobby Lobby over the years.
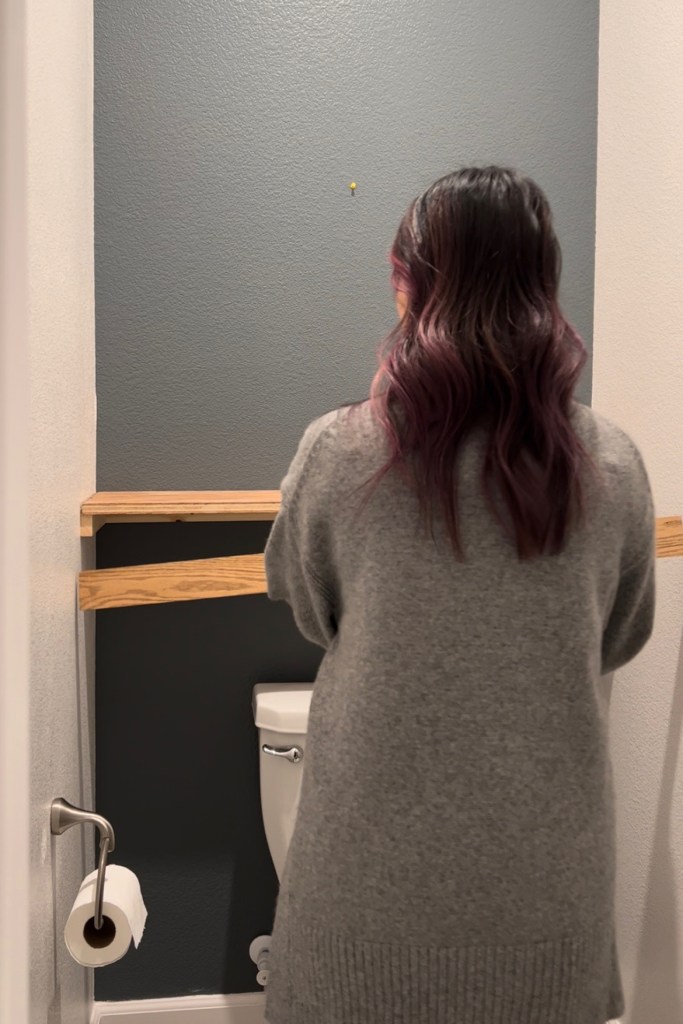

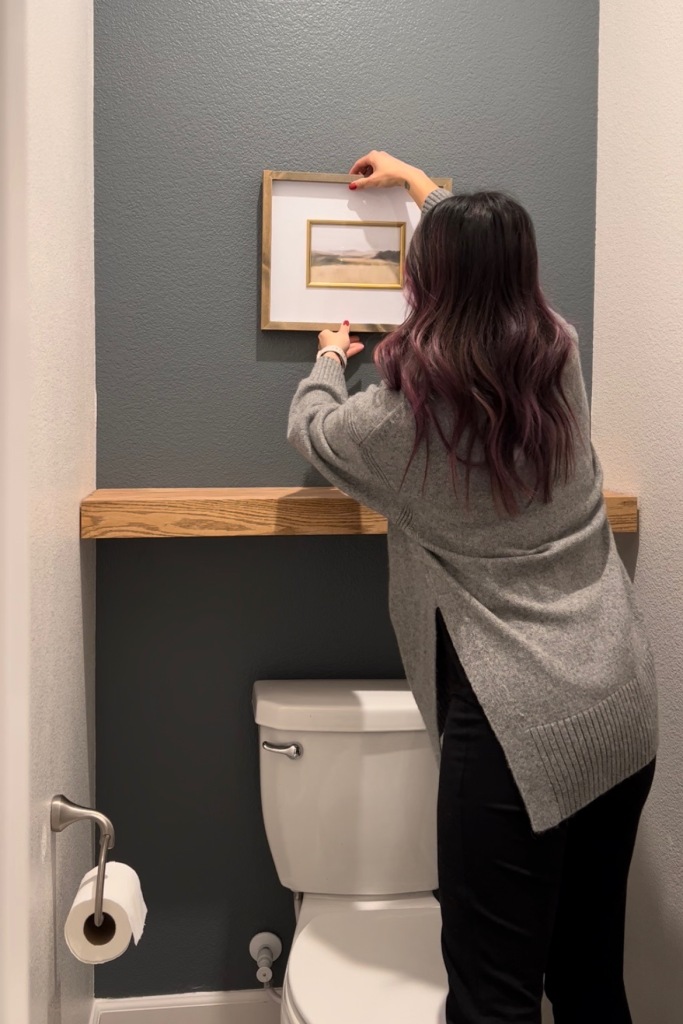
Now this space is has a little more character and is a little more enjoyable to spend time in!


What do you think? Is this something you would try?
Until next time,
Emily
