
Have you ever come across a piece of artwork that you feel was made for your home but would leave you starving, broke, and homeless if you purchased it? Okay… That’s an exaggeration, but art pieces can definitely get pricey!
Back in May, I created a DIY textured wall art inspired by Studio Mcgee’s $582 Textured Movement piece. Since then, I have fallen in love with DIY textured wall art… They’re quick, affordable, and make such a big impact! One of my favorites is a piece that I made a few months ago, inspired by Williams Sonoma’s Neutral Swirl Series.

This set, which belongs to their Thom Filicia Home Collection, is a whopping $1,700. Yes, you read that right… One thousand and seven hundred dollars. Don’t get me wrong… It’s a beautiful set. I can see it hanging beautifully in so many different areas of our home, but what average, middle-class American can afford to spend that much on a piece of art? I can purchase 170 dinners, build myself another fireplace with stone tiles and adjacent floating shelves, or even travel to Europe! What’s even more surprising is that I’ve actually seen this artwork in some people’s homes (no judgement, just envy).
So… Why not try to make my own version?
I started with a blank 30×40 canvas from Michaels. This canvas was originally $34, but I purchased it for approximately $15 with a 40% off coupon. Side note… Michaels almost always has some type of a coupon or sale going on. Unless you’re in a rush to purchase materials for a time-sensitive project, I recommend waiting for the item to be discounted!
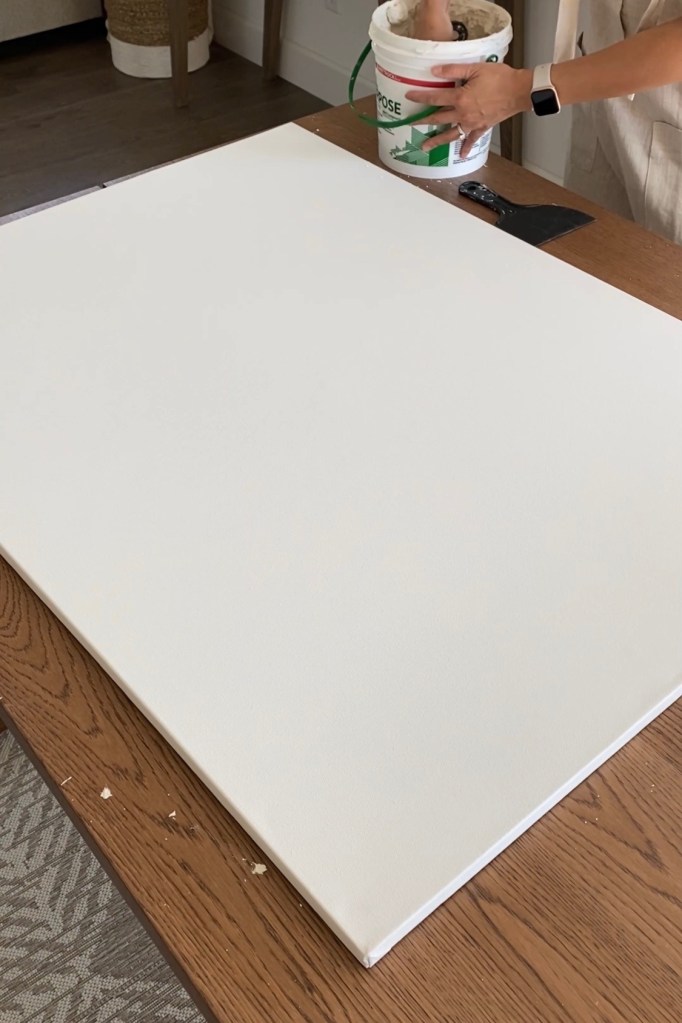
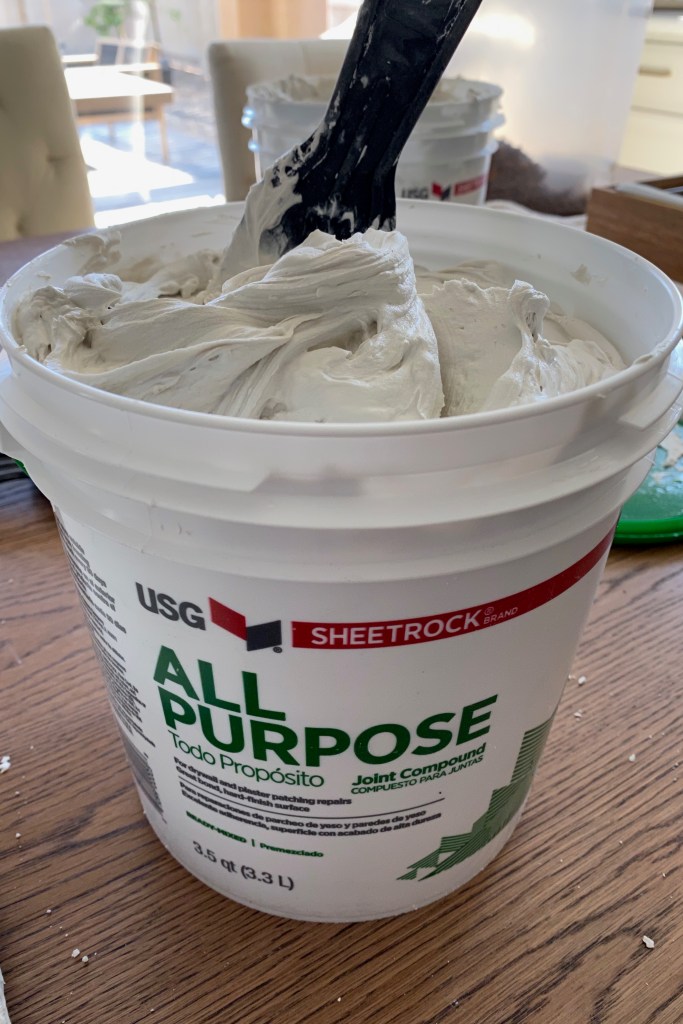
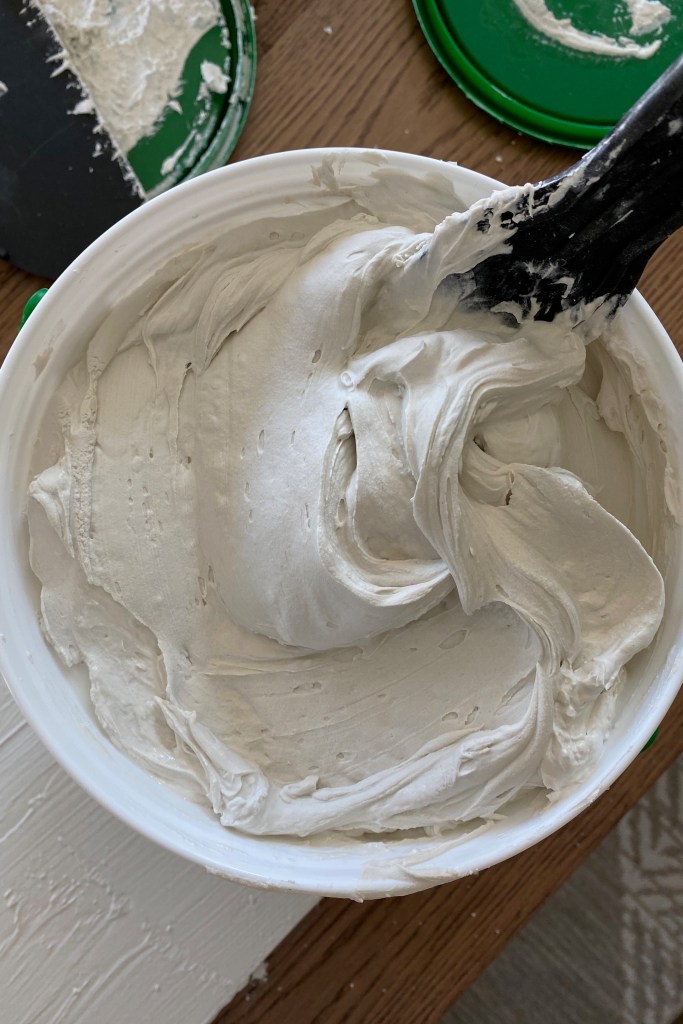
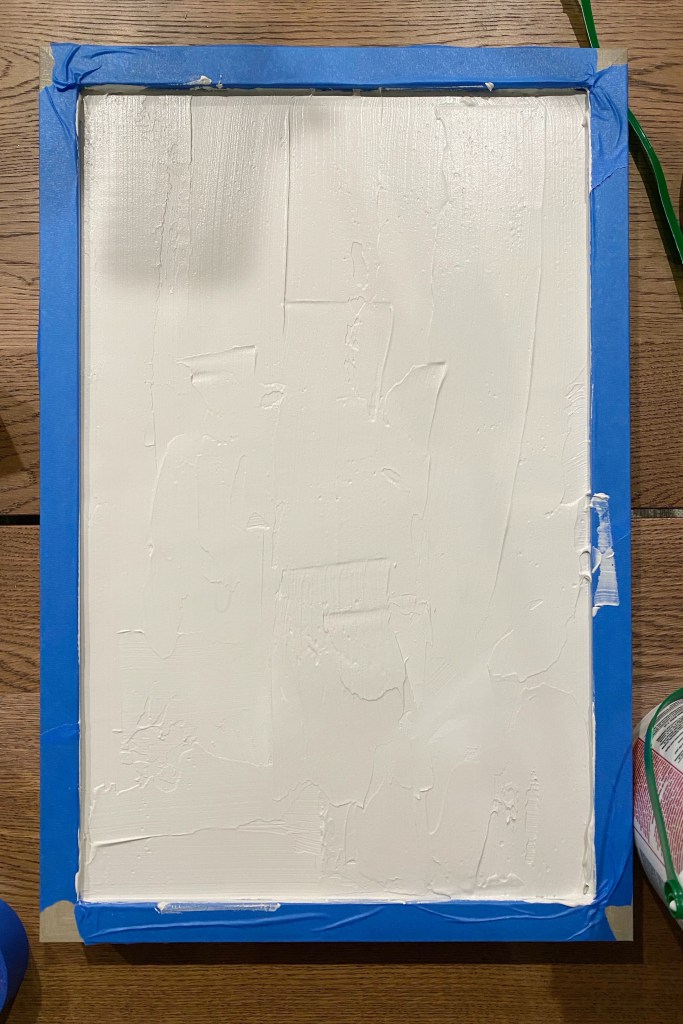
Next, I used some joint compound that I had laying around. I used an all purpose premixed joint compound by USG Sheetrock Brand. Joint compound has a consistency that resembles a thick paste, thick pudding, or cream cheese spread. It’s usually used to repair drywall but is also a great product to use for textured wall art! I’ve also seen some people use wood filler or spackle for this DIY.
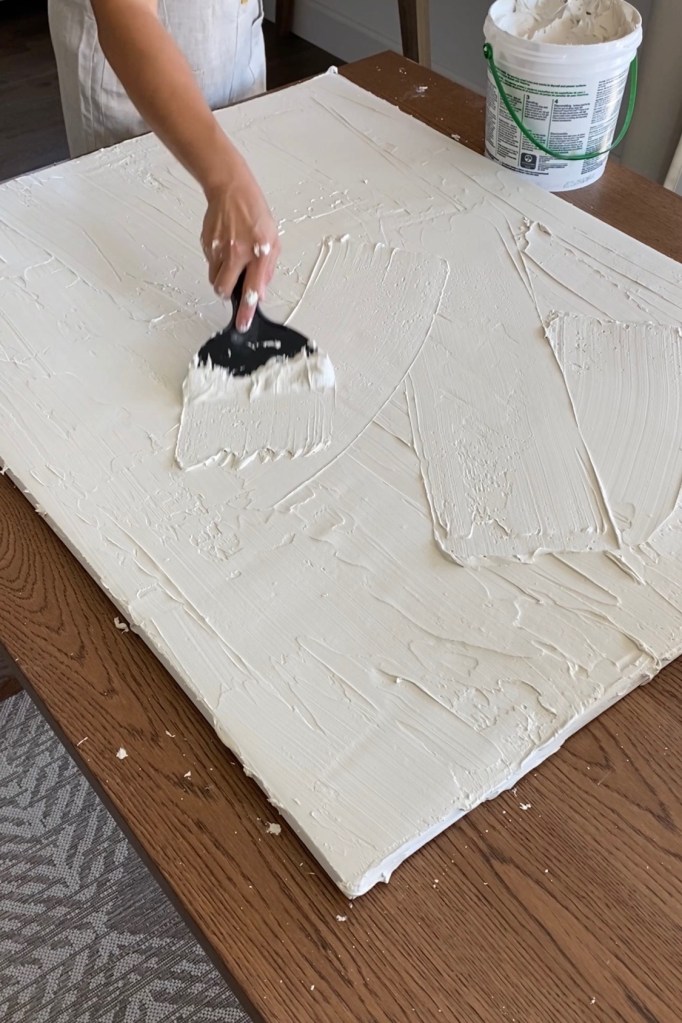
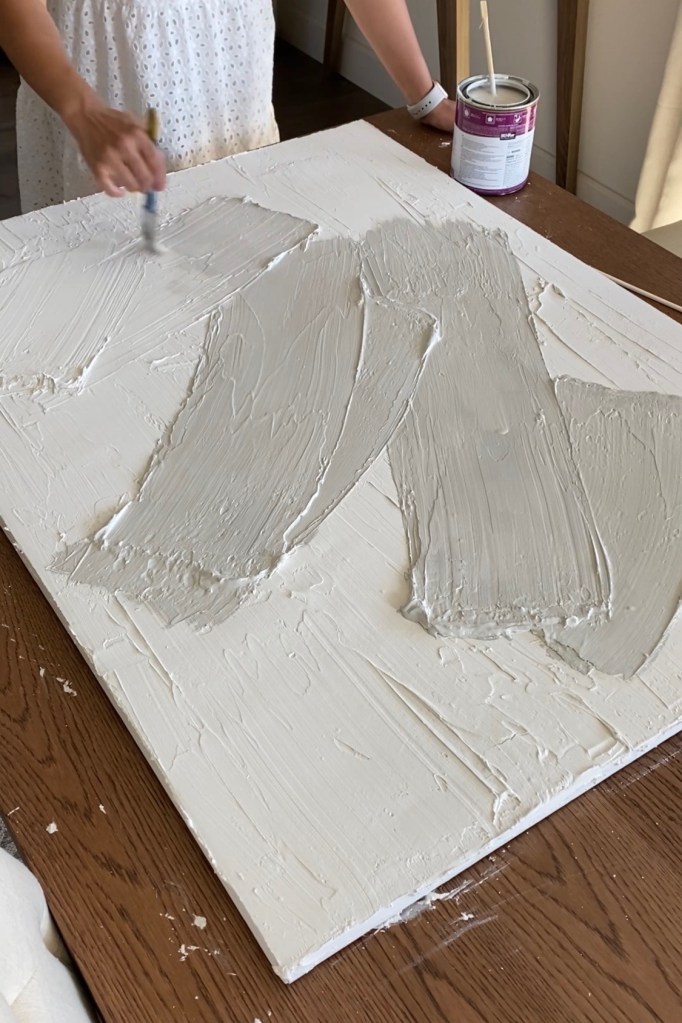
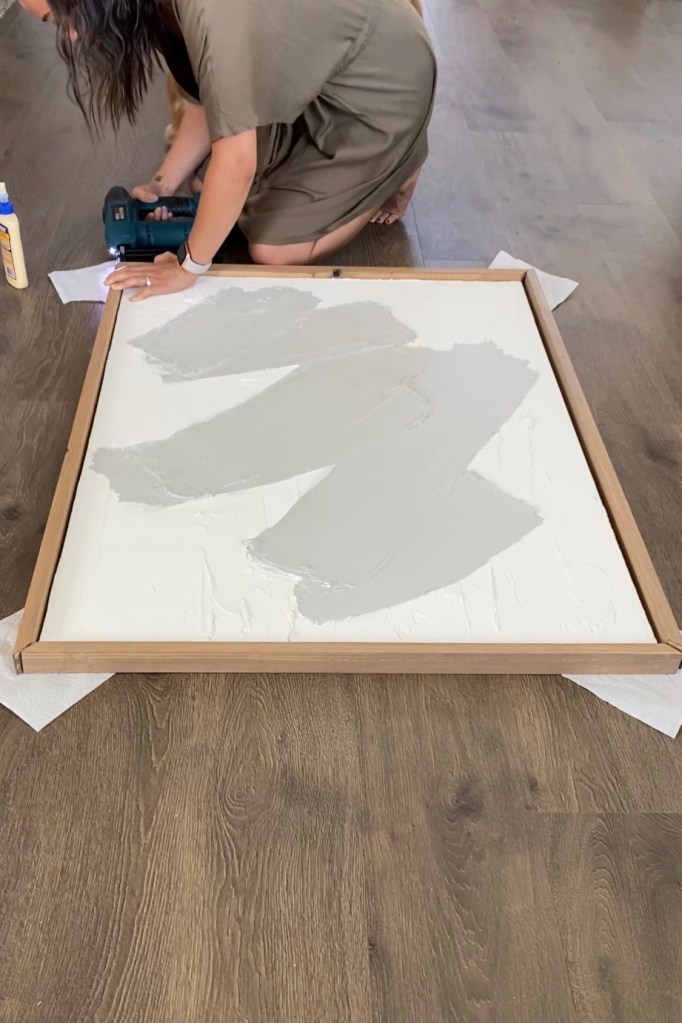
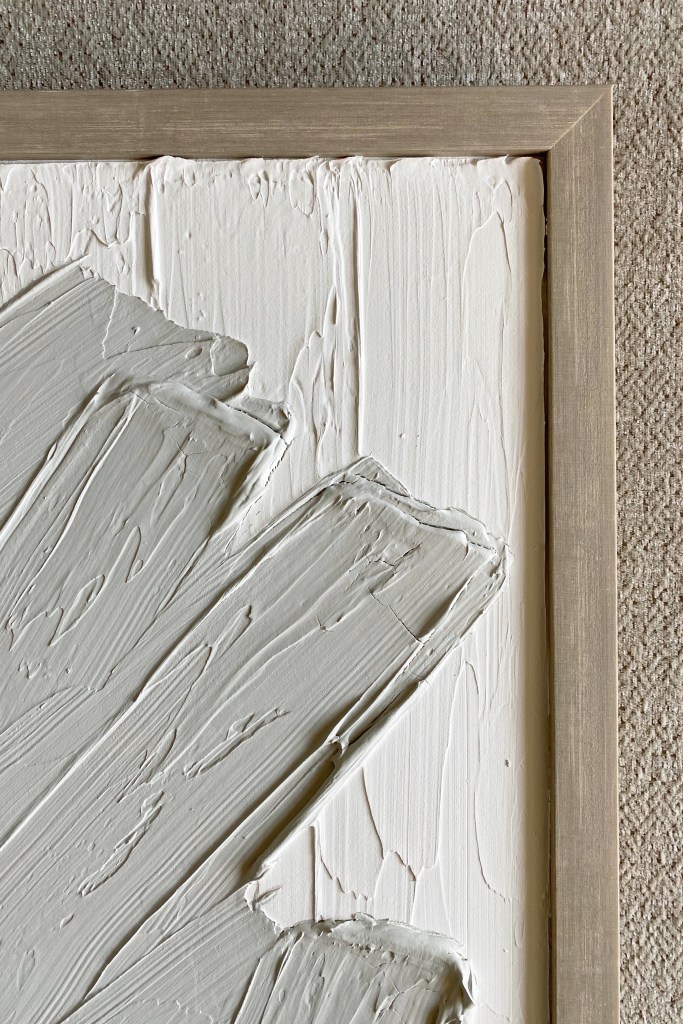
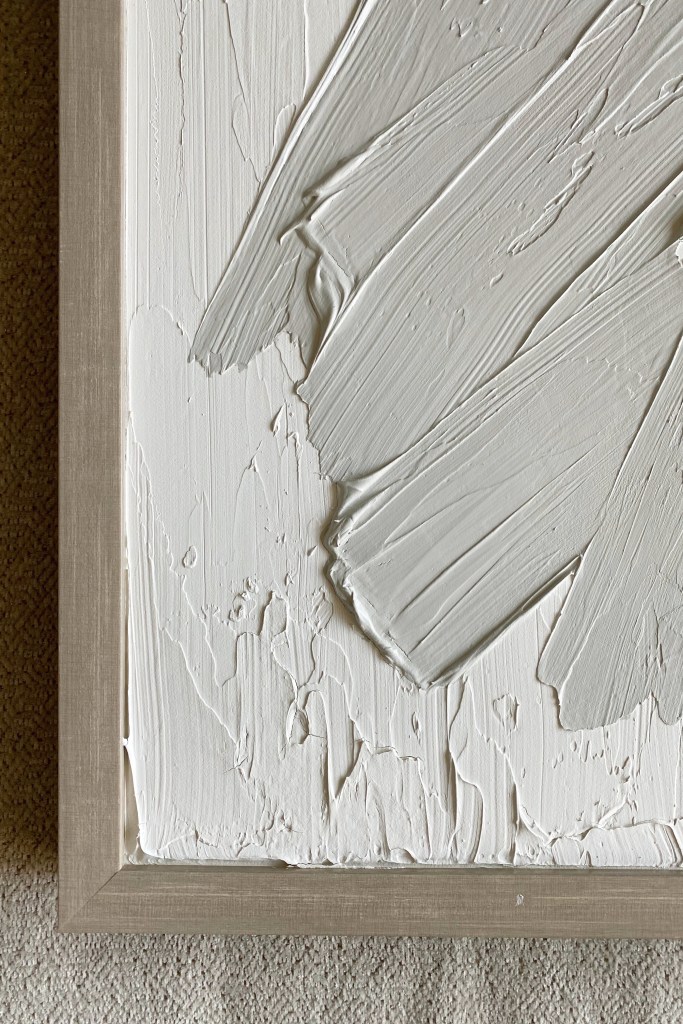
I covered my entire canvas with joint compound and smoothed it out to create a nice base layer.


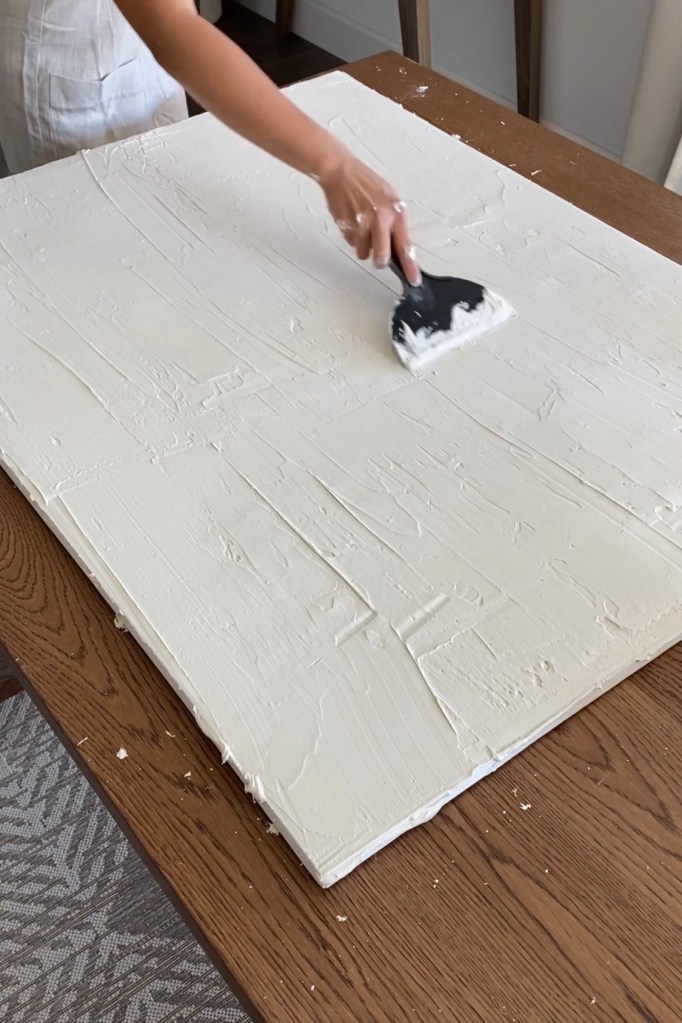
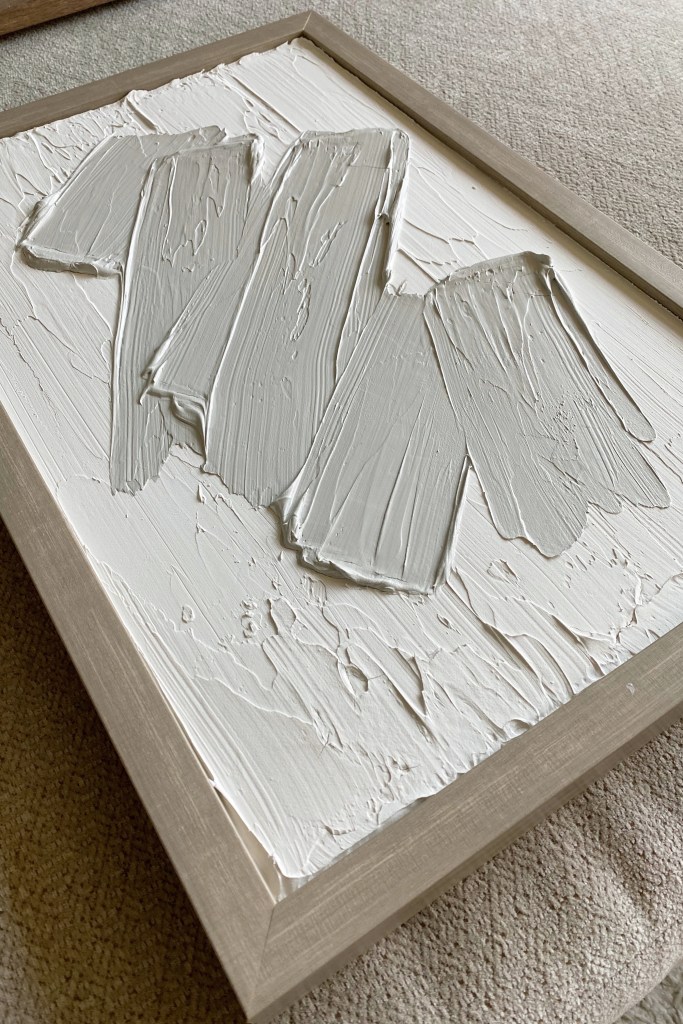
This is where things get fun and personalized! I drew out a rough sketch on paper and then created my faux brush strokes on my canvas using a large taping knife. Taping knives of all sizes should work for this step and will create different looks.
Tips for this step:
1. Scoop out a new chunk of joint compound with your taping knife before making each stroke. This will make each faux brush stroke stand out against the smoother background and will help create more texture and dimension.
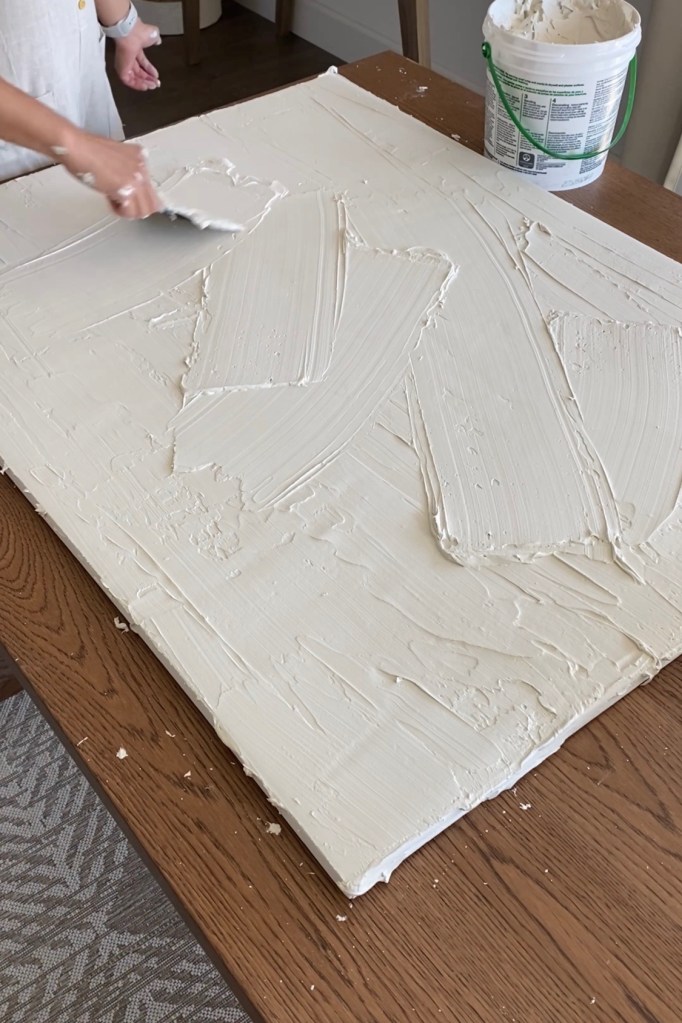
2. Don’t use too much joint compound at once. Thick layers of joint compound tend to crack during the drying process.
3. If you don’t like your design, “erase” it by smoothing out the joint compound so that it blends in with your base layer. Don’t wait too long before finalizing your design… The joint compound will start drying soon.
4. Go over your pattern 2 or 3 times (with a new scoop of joint compound each time) for even more texture.
5. Use the flat end of a utensil to carve out a rectangular space in a corner to write your name/initials.

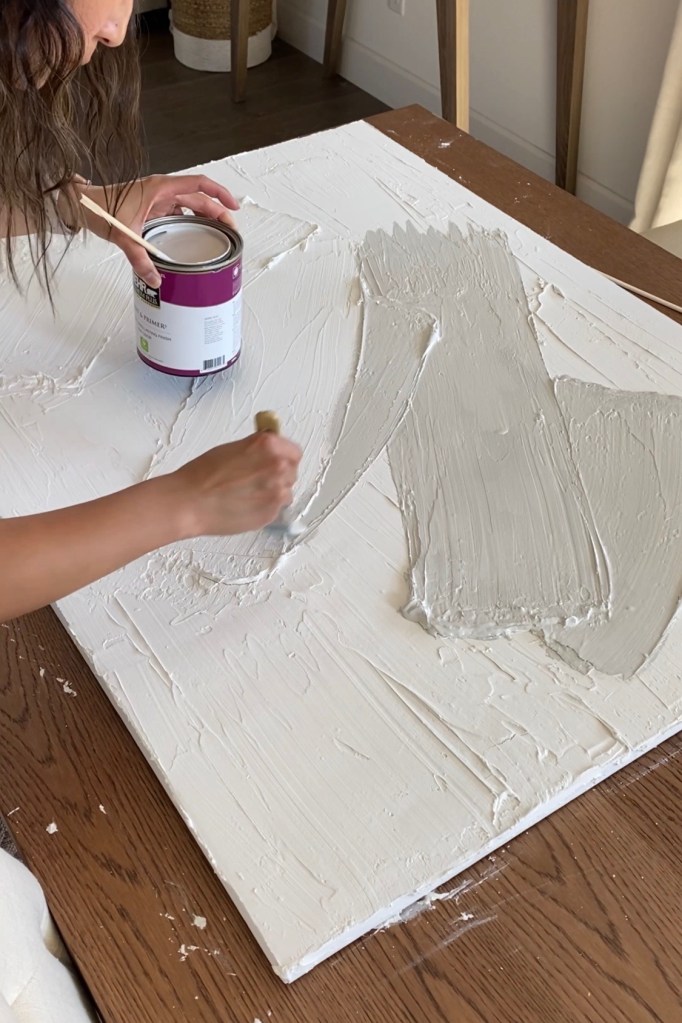
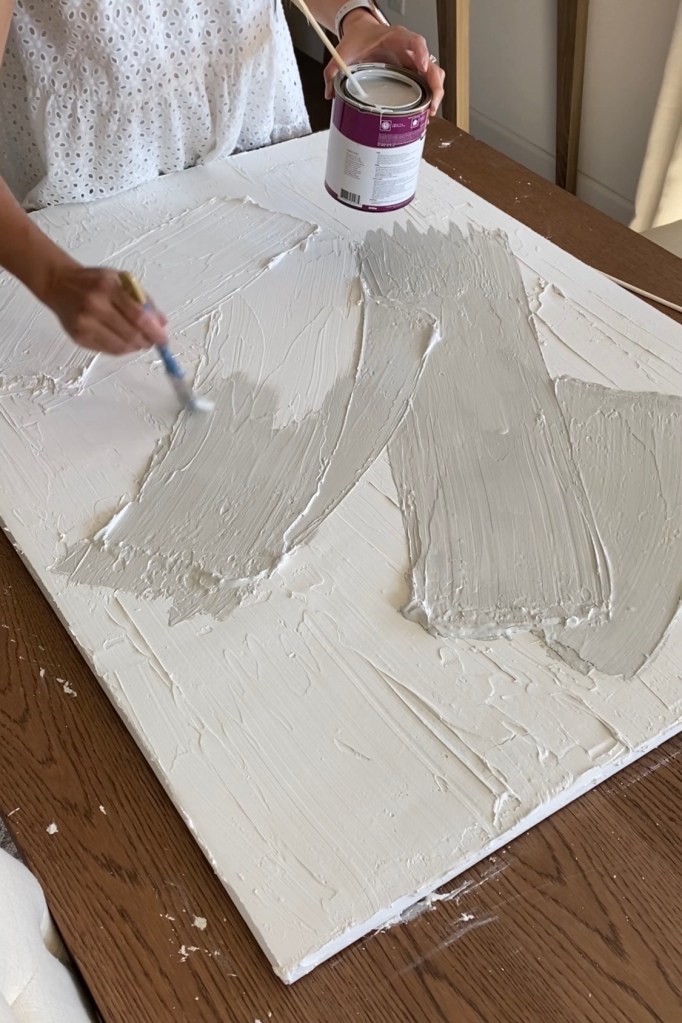
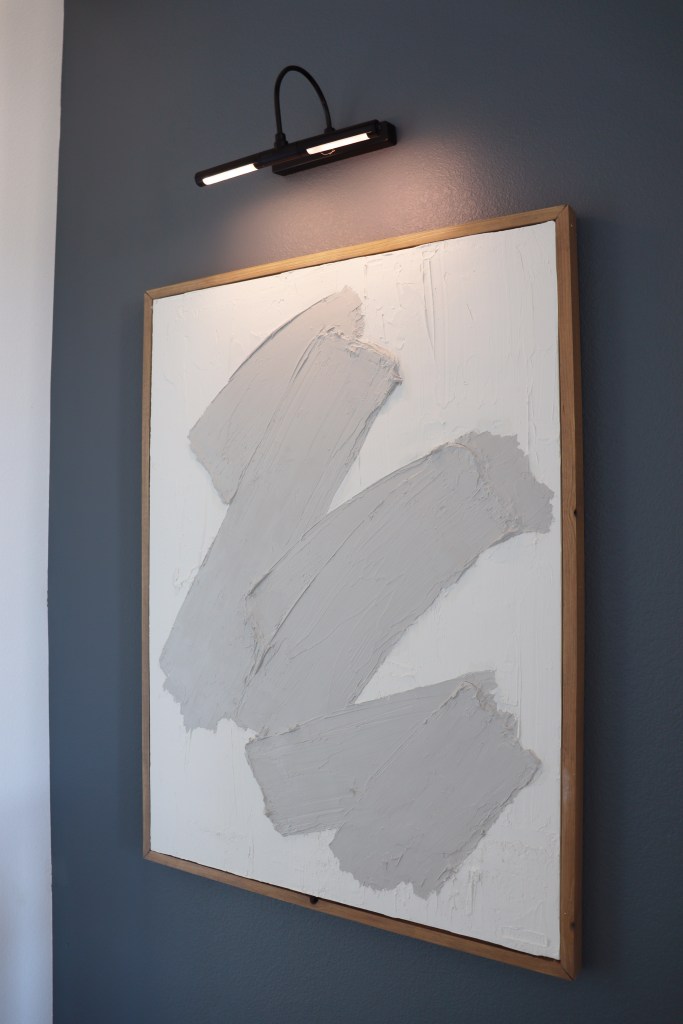
Once I was happy with how my piece looked, I let it dry for approximately 2-3 days. When the piece was COMPLETELY dry and had a chalky feel, I sanded down the bumpy and uneven texture on the edge of the canvas using a sanding block. Then, I painted my faux brush strokes using some leftover wall paint. I used a Repose Gray by Sherwin Williams, color matched with Behr paint at Home Depot. You can also eliminate this step and leave the entire piece white for an even simpler look.
Although my piece had only a few minor cracks in thicker areas, a few of my Instagram followers who made their own versions of this have told me that their pieces cracked in some areas. I’d recommend filling in the cracks with more joint compound (only as needed) once that first layer is dry or filling in smaller cracks with paint.
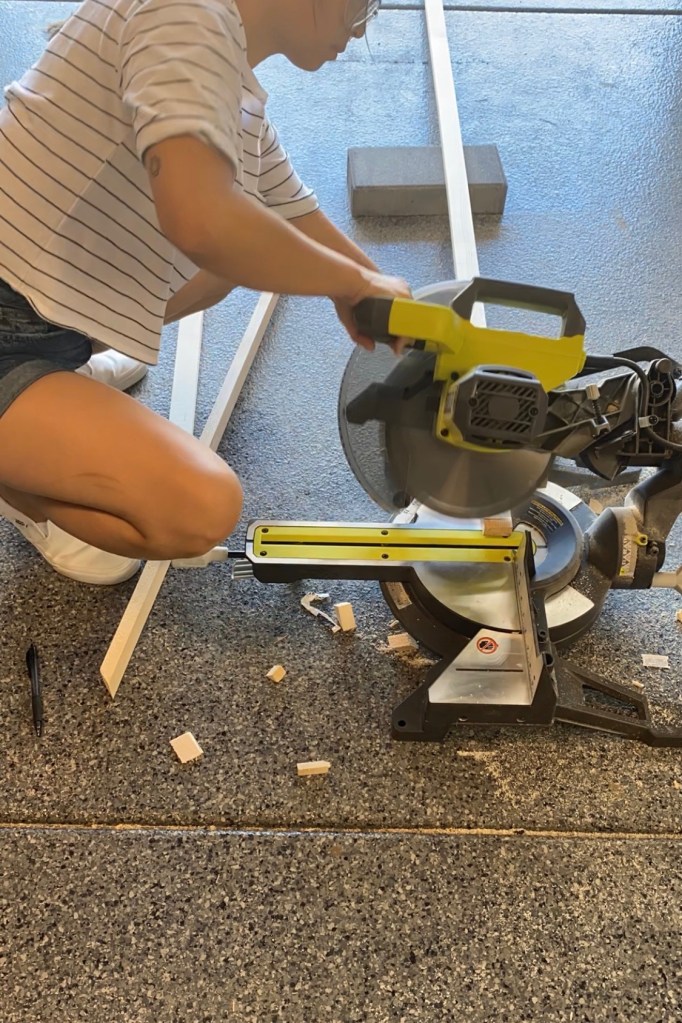
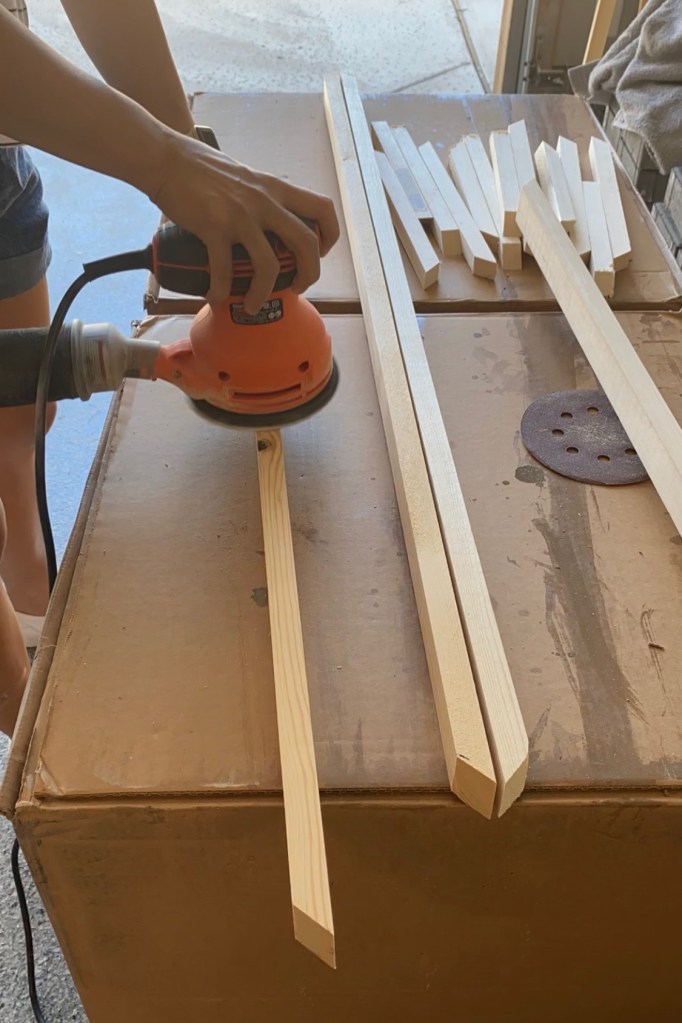
For a more finished look, I built a wooden frame for this piece using 1×2 pine boards that I cut with mitered edges, sanded, stained (using Varathane Flagstone), glued, and nailed together.

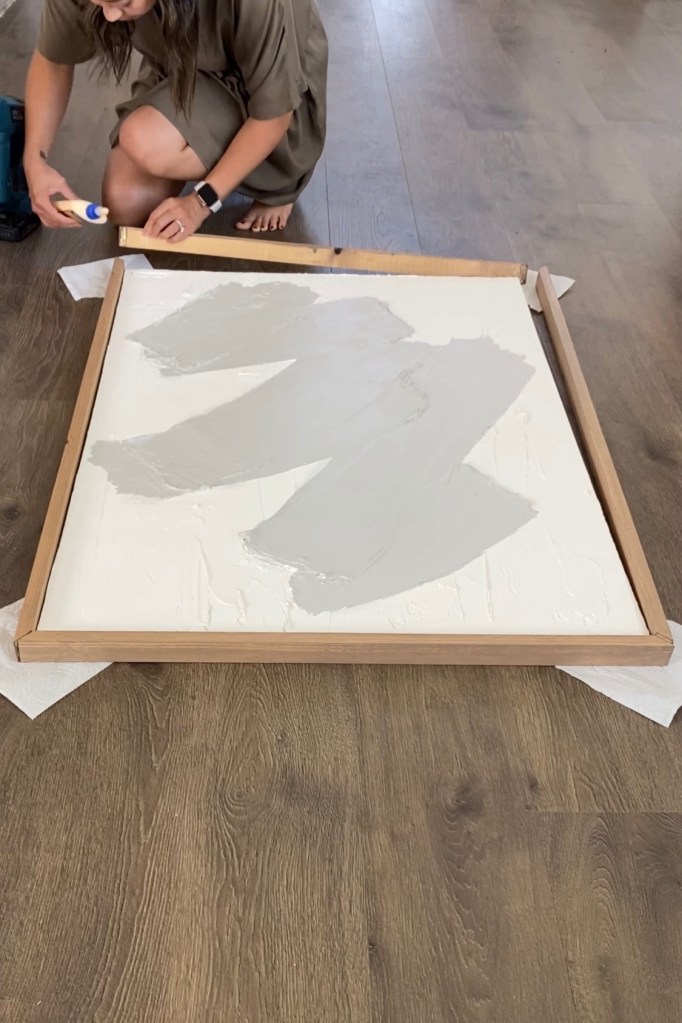
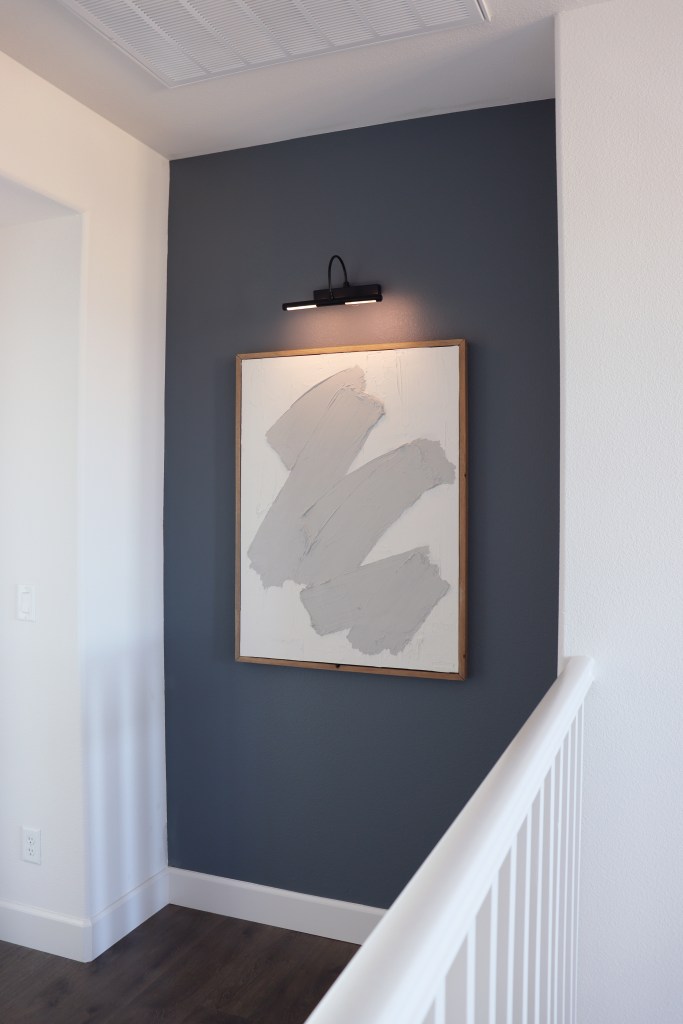
I hammered some sawtooth picture hangers onto the back of the canvas and put up my new favorite piece at the end of our second floor hallway. I also painted the wall a charcoal blue (Ocean Swell by Behr) and added a battery-powered picture light from Amazon (just a 5-minute installation) to make the piece pop a little more.


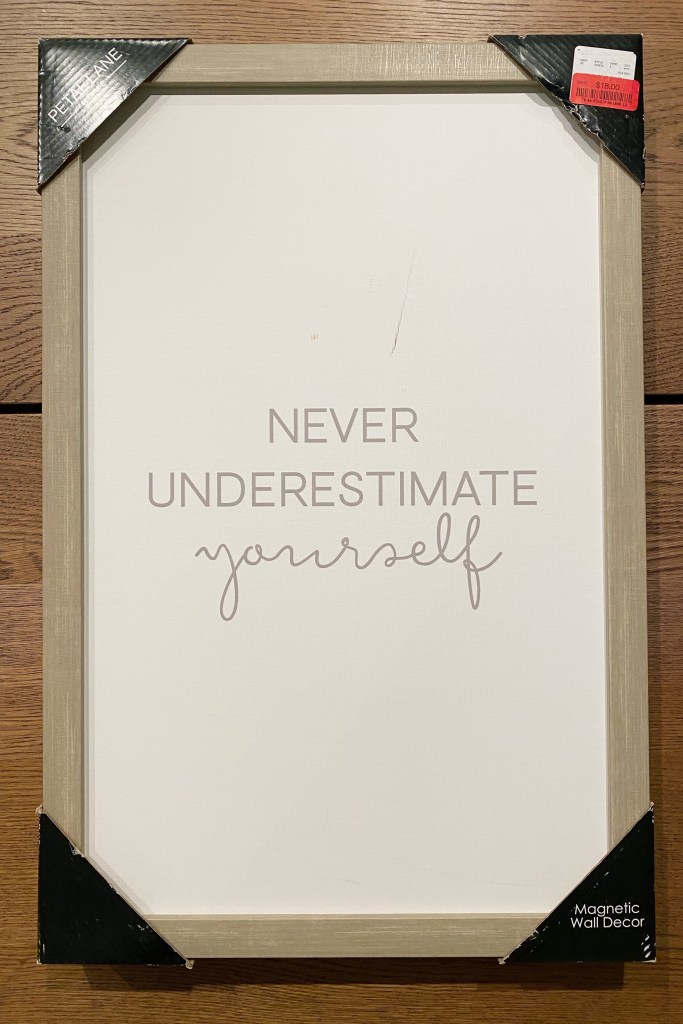
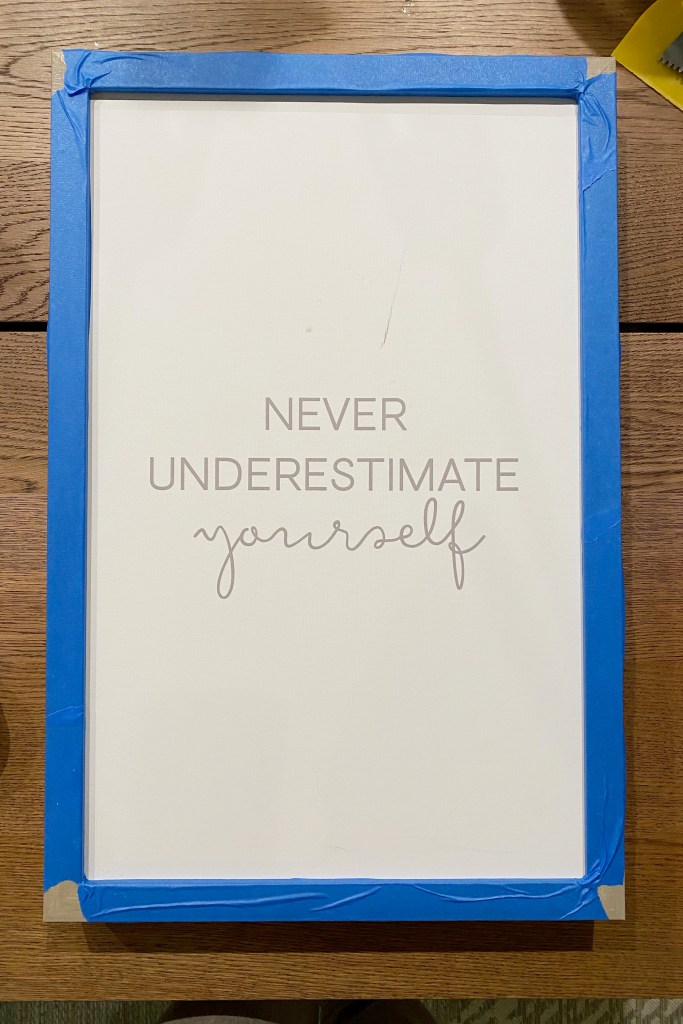
A few months later, I decided to make another version as a gift to a friend. Instead of using a blank canvas and building my own frame, I purchased a framed piece of artwork on clearance at Home Goods in the perfect size with my ideal frame color. I covered the frame with painter’s tape and created another textured art piece over the existing print. This one turned out even better… I almost didn’t give it away!

Tips for this technique:
1. Avoid choosing a piece with a lot of texture, as the existing texture will likely show through.
2. If you’re using a colored piece of artwork, paint over the piece with white before applying the joint compound.
3. Minimize costs by using a thrifted, discounted, or old piece of artwork. Since you’re covering the original piece anyway, it doesn’t have to be brand new. Just make sure you like the frame!

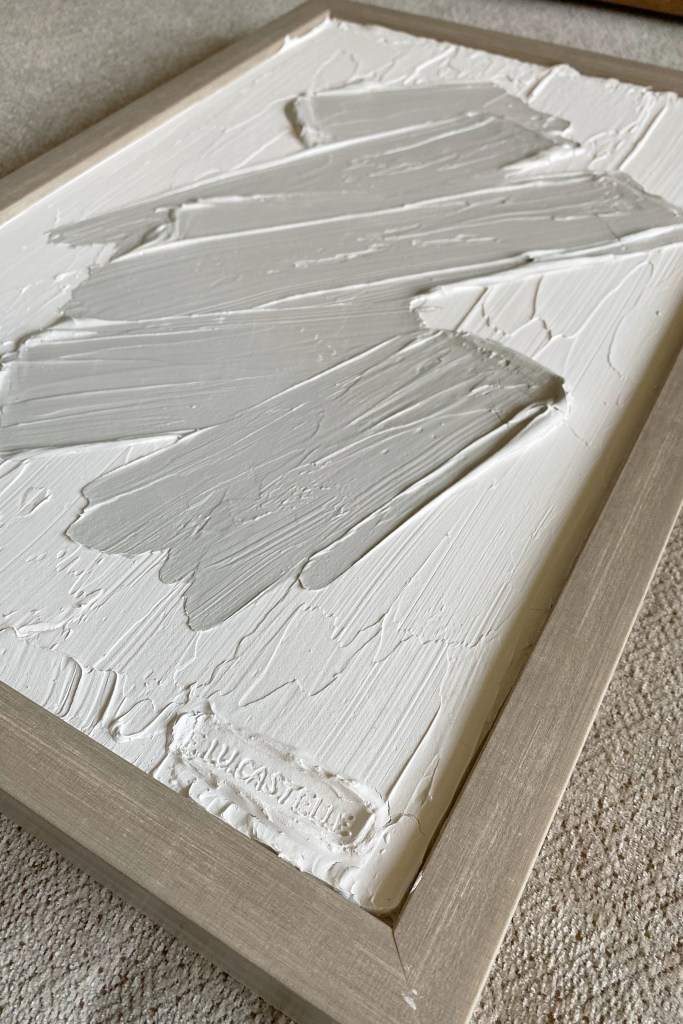
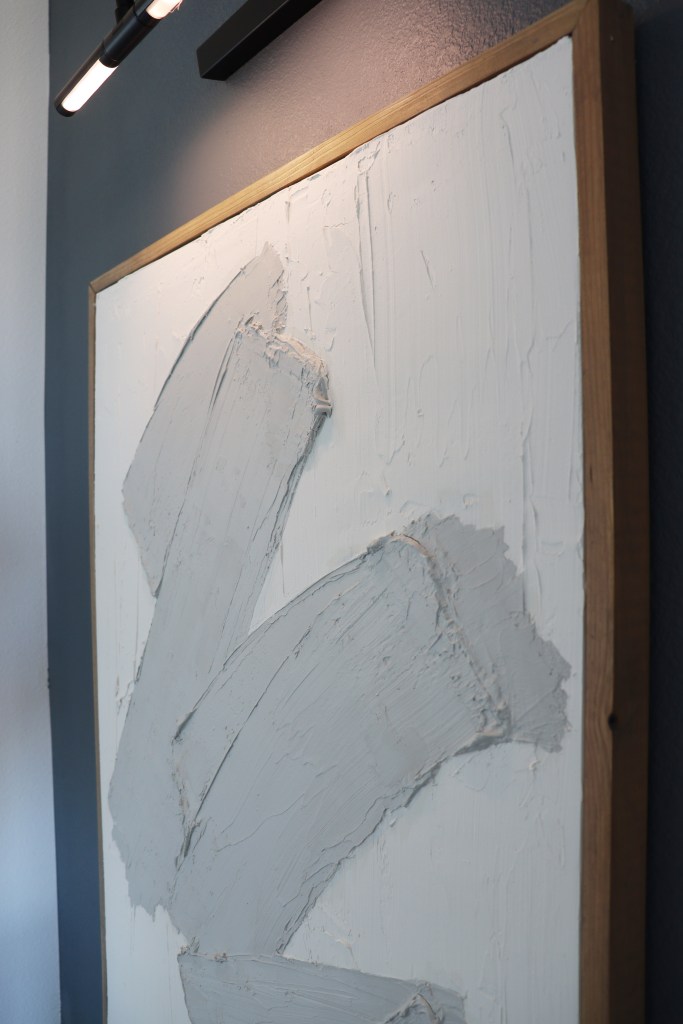
Although my version of Williams Sonoma’s Neutral Swirl Series may not look as high-end and sophisticated as the original, it cost me less than $20 to make (because I had all the supplies on hand but < $50 otherwise) and was actually very therapeutic to create! And I mean… LOOK AT THAT TEXTURE!
Is this something you’d like to try? Feel free to send me photos of your finished product. I’d love to see!
Lastly, don’t forget to check out my Instagram for my latest projects and ideas!
Until next time,
Emily
